Hyper-V Manager Virtual Machine & GPU Passthrough Guide
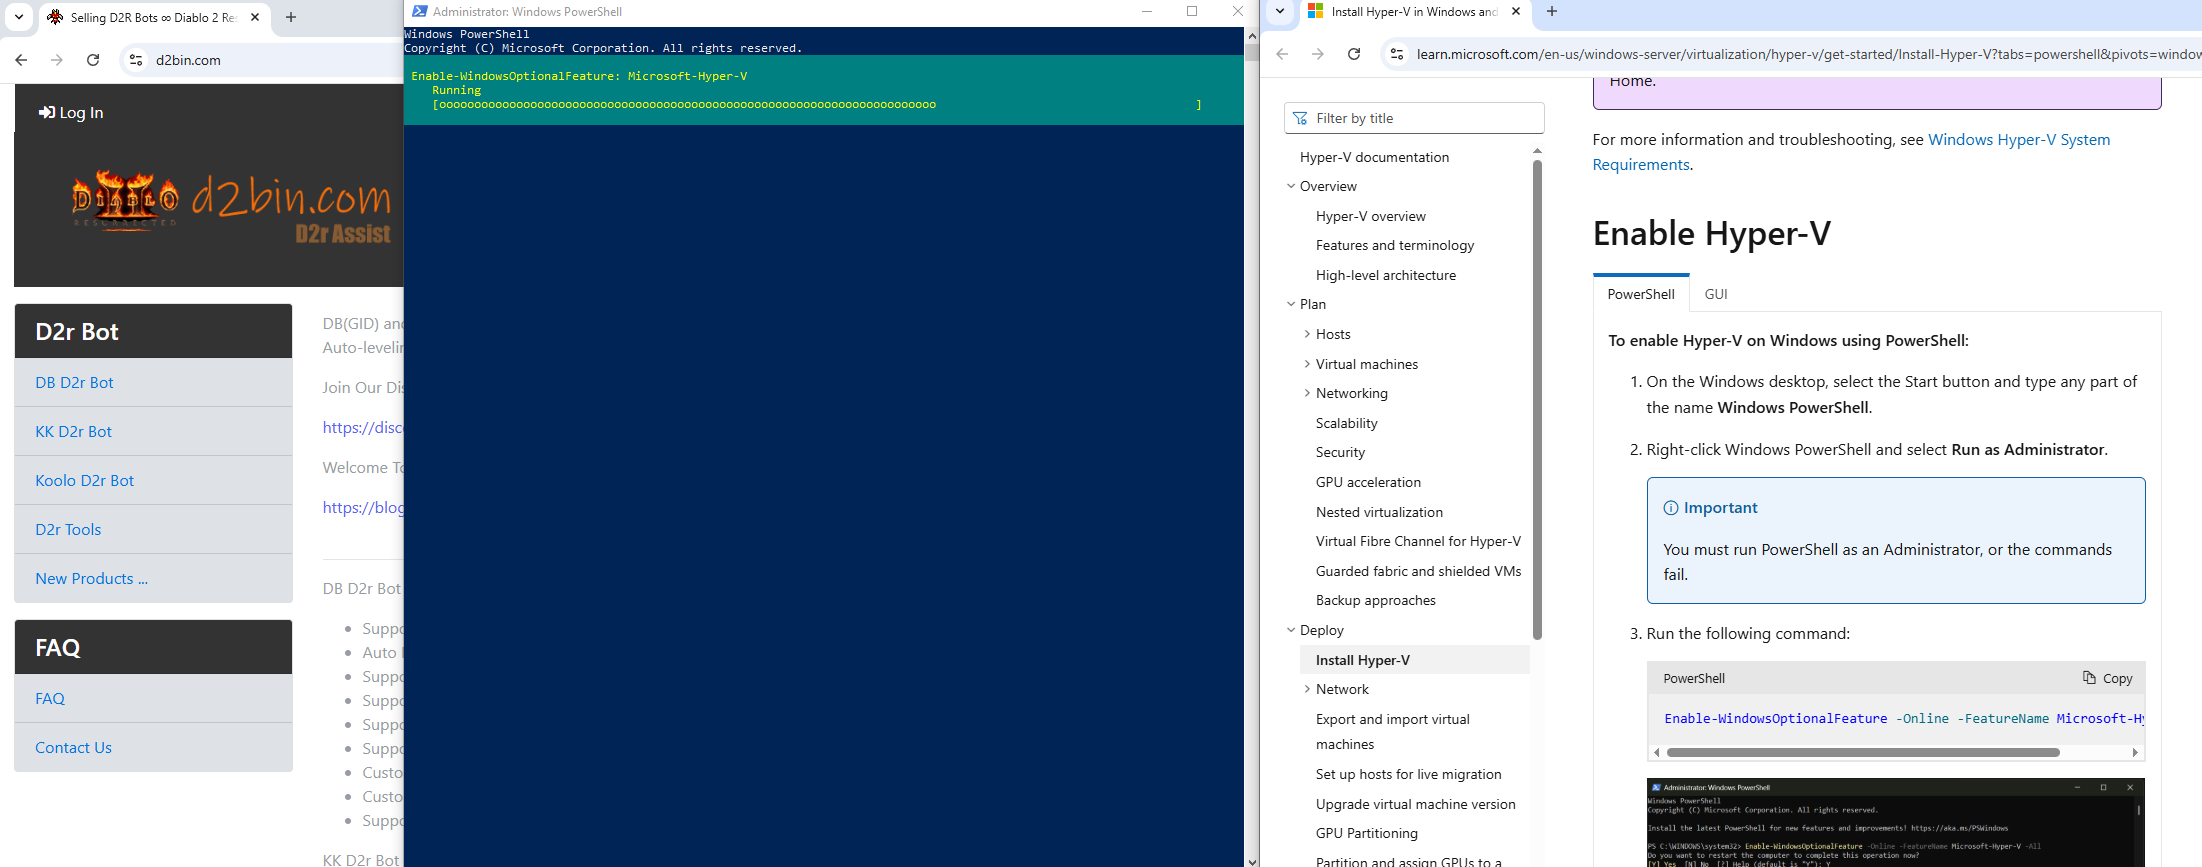
This guide will assume you already have Hyper-V installed. See this guide here to learn how. Please note you can still [enable this on windows home edition](https://www.xda-developers.com/how-to-install-hyper-v-windows-11-home/#:~:text=Open the Settings app and,may have to restart afterwards.).
Install Hyper-V

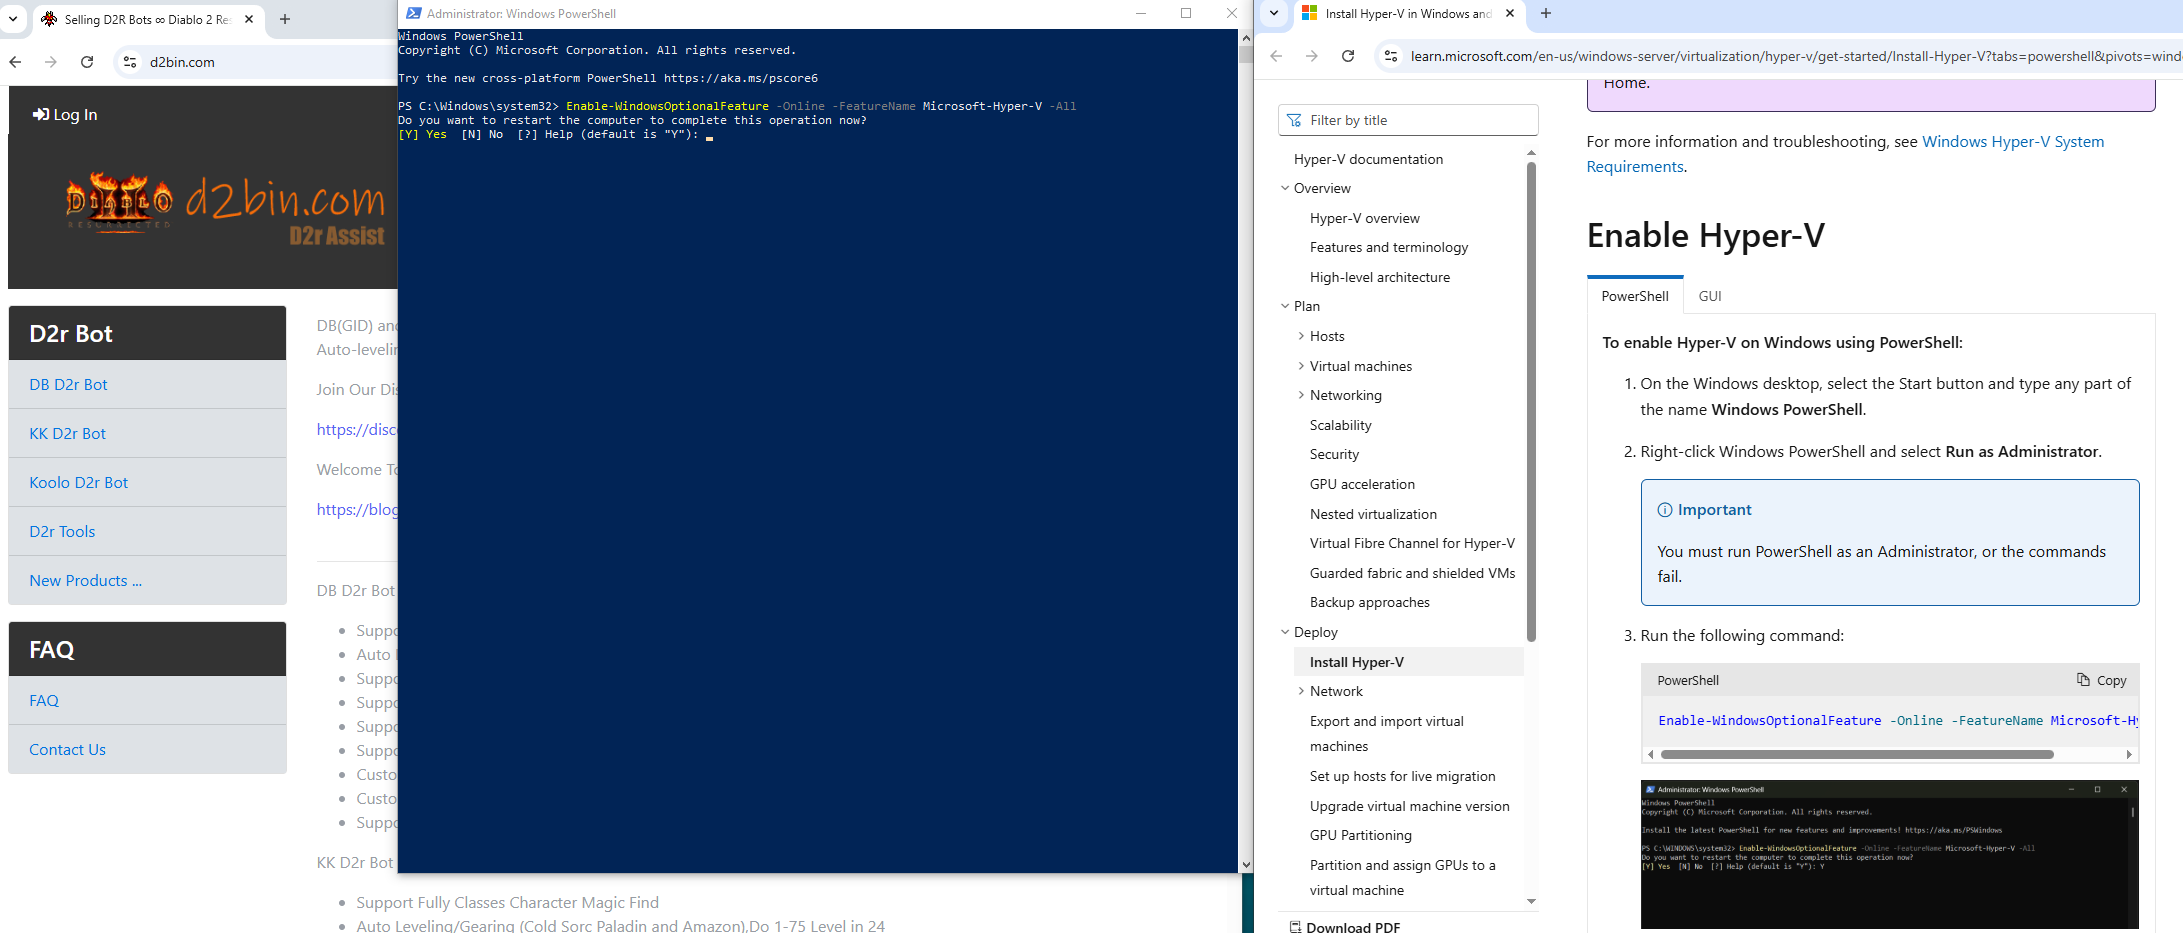
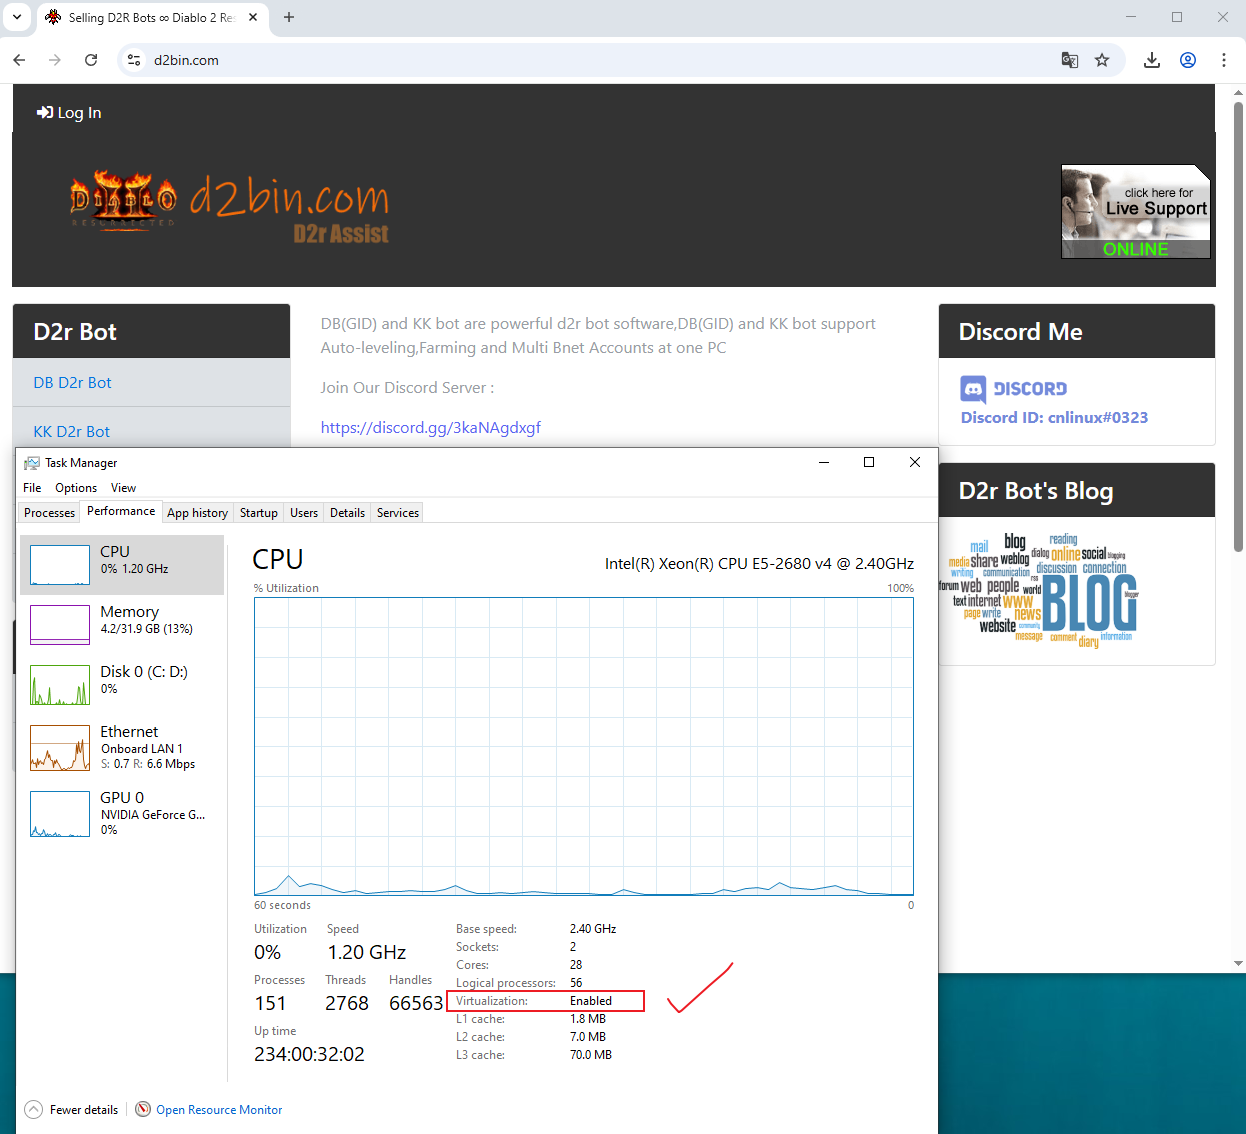
You will need to have virtualization enabled in your BIOS. Click Here to learn how.
60gb of free space is required
NOTE: AMD CPU laptops with integrated graphics & a dedicated Nvidia card may have issues. You may need to disable your integrated graphics for passthrough to work.
Check by opening task manager clicking the performance tab & then CPU. Look for Virtualization: Enabled
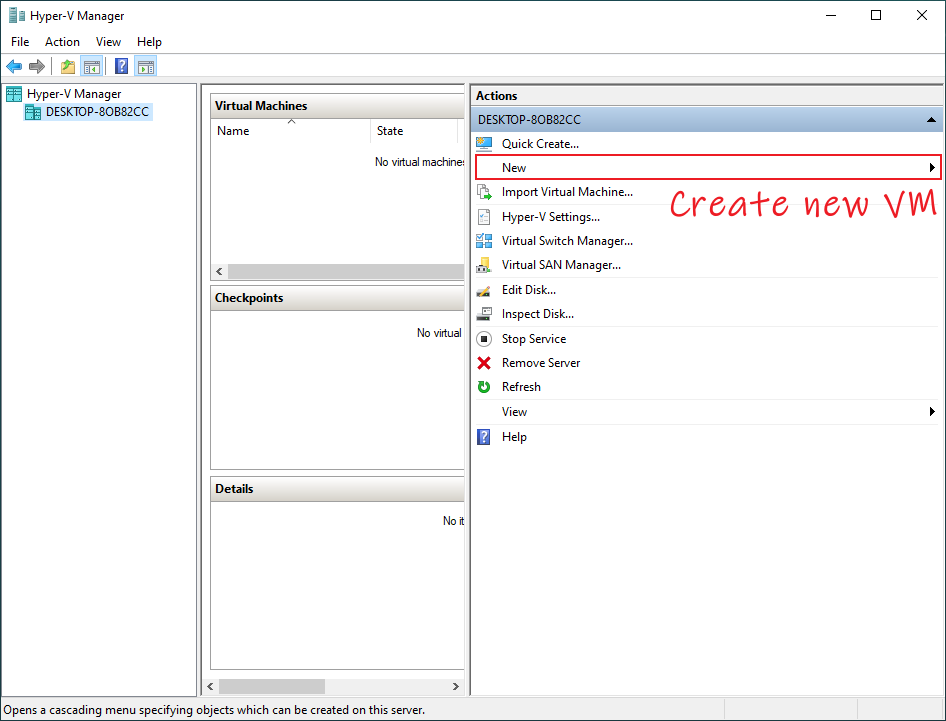
1. Open Hyper-V manager & create a new virtual machine
Open Hyper-V manager

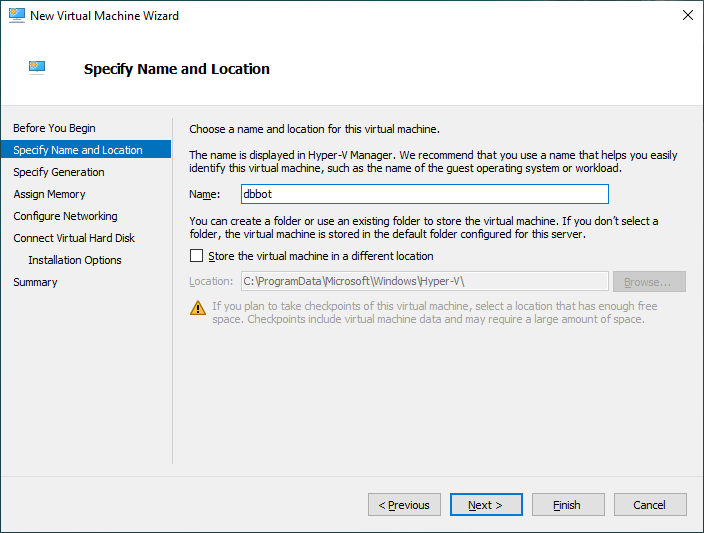
Name your virtual machine. It is recommended you change the location the VM is stored.
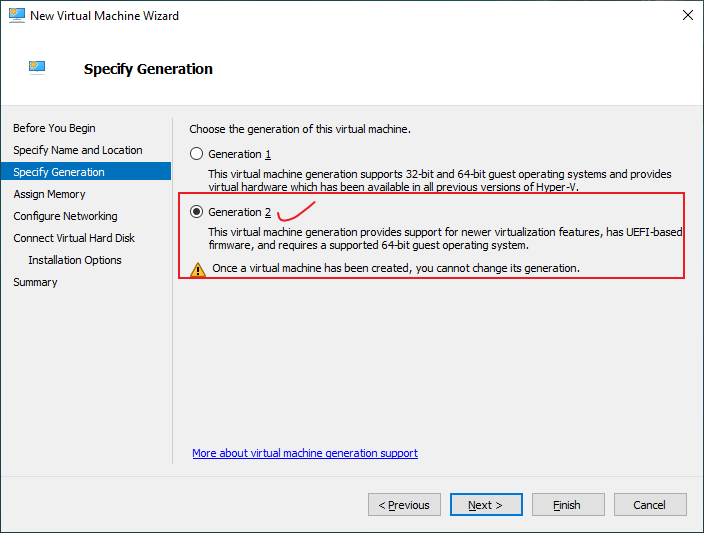
Select Generation 2
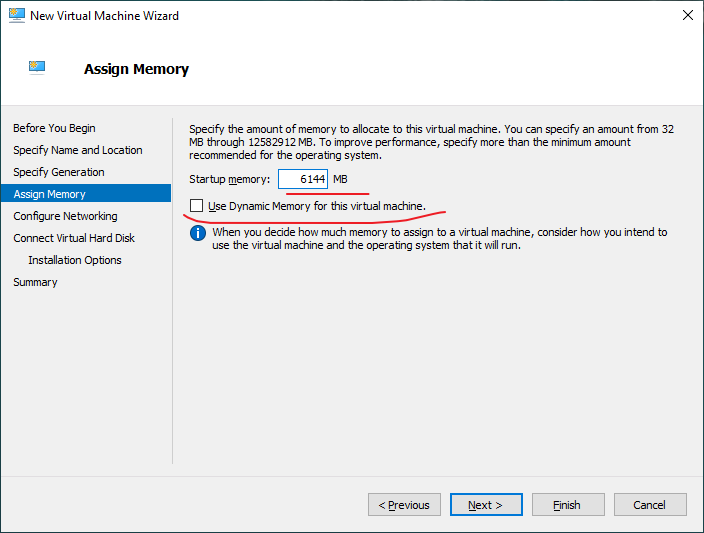
Uncheck dynamic memory & allocate a sufficient amount of memory to the VM. Recommended 4gb-6gb
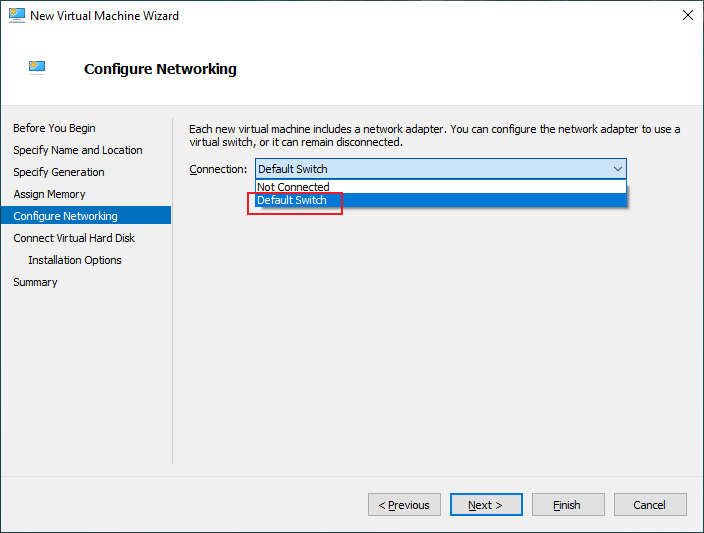
Select Default Switch
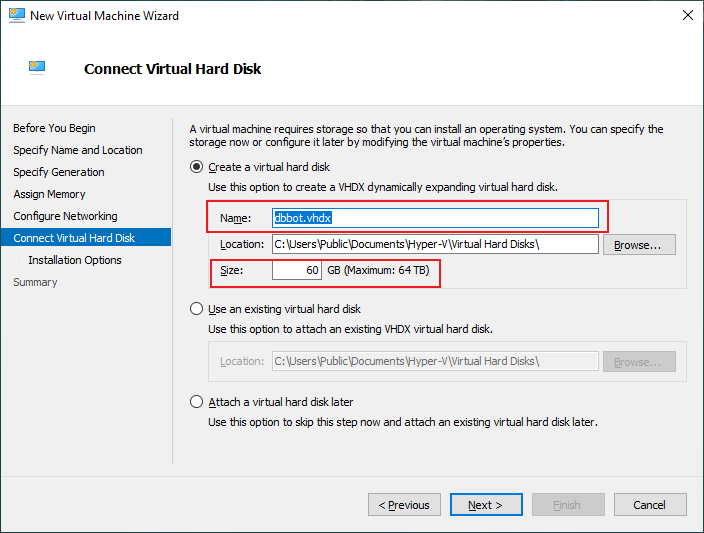
Set your disk size to at least 60gb and ensure the .vhdx file is saved in the same location as the VM.
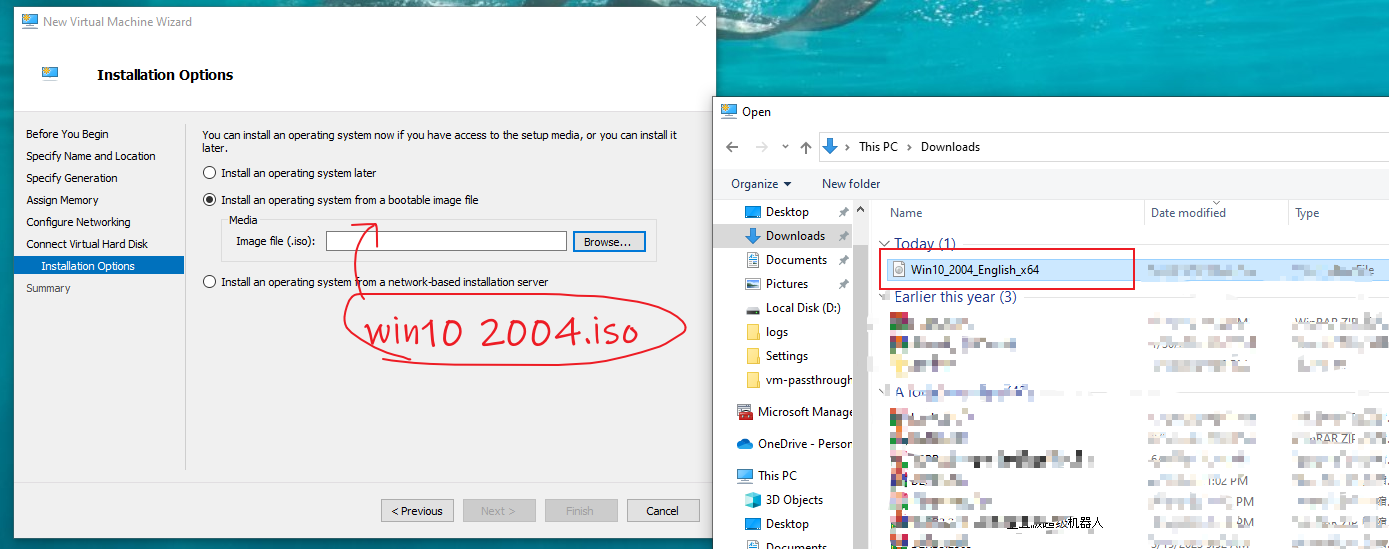
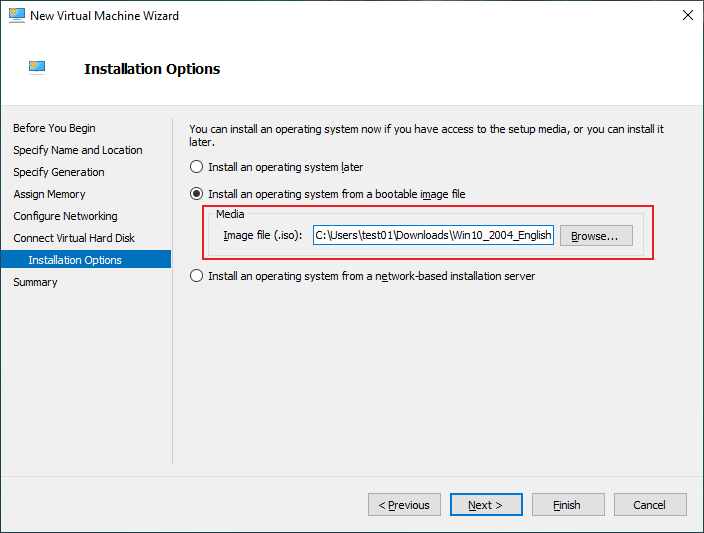
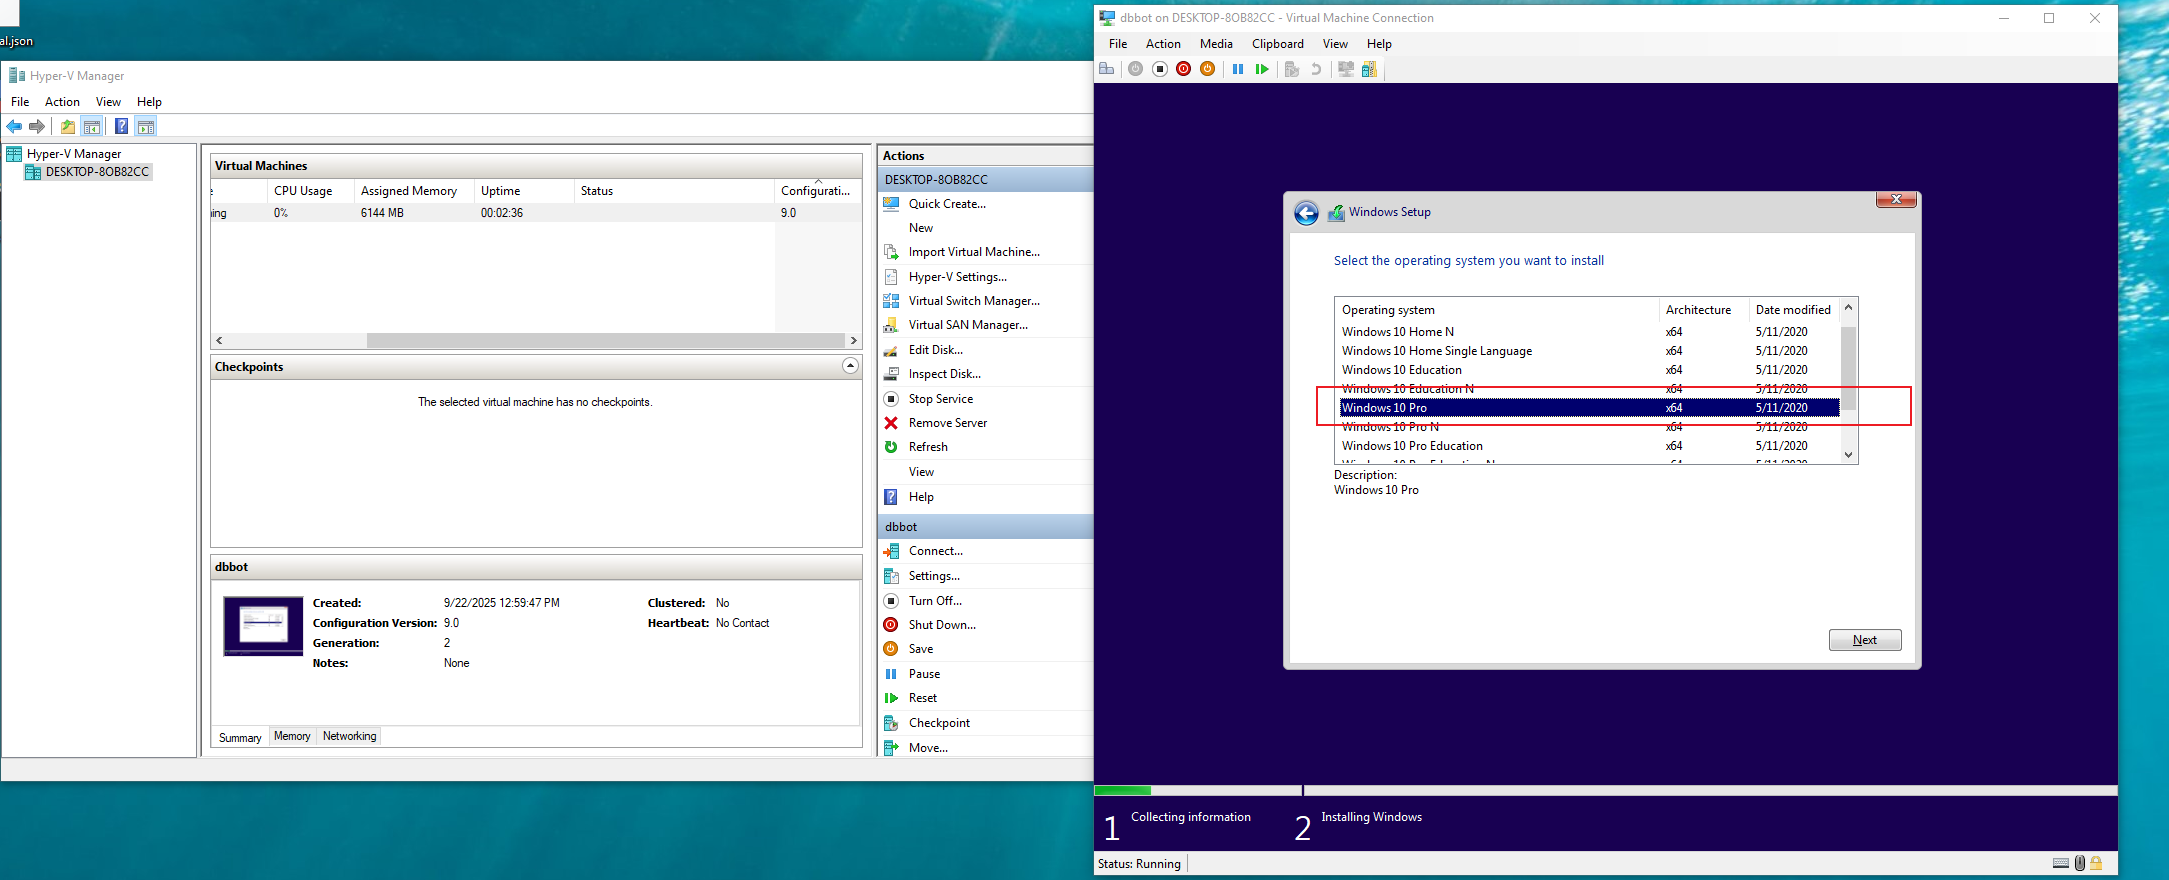
Select a windows .iso for the VM to use. You need to use windows version 2004 for this to work. Windows 2004 is used specifically in this case and a ISO can be found HERE.
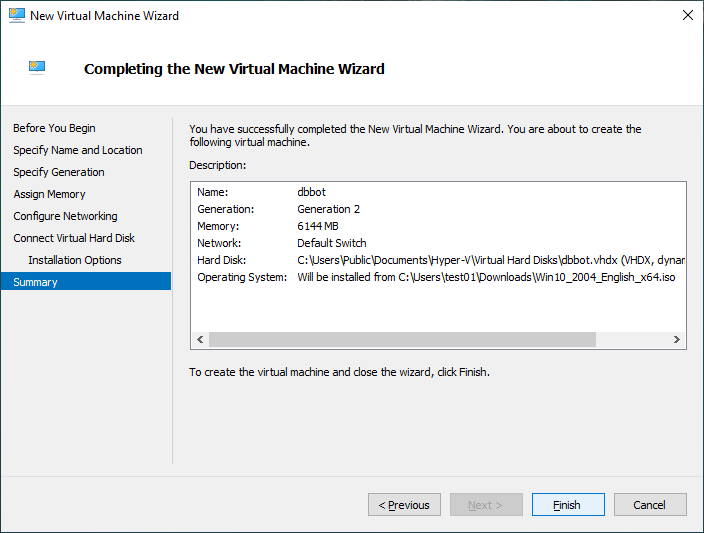
Select Finish
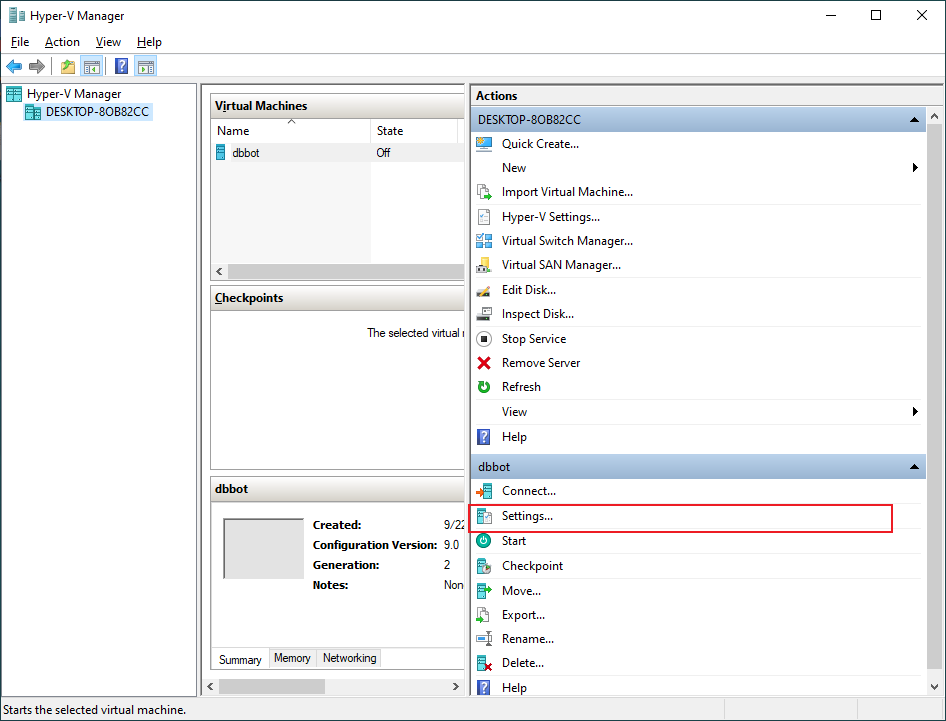
2. Open hyper-V manager select the newly created VM & then click settings.
Open Hyper-V settings for dbbot (VM Name)
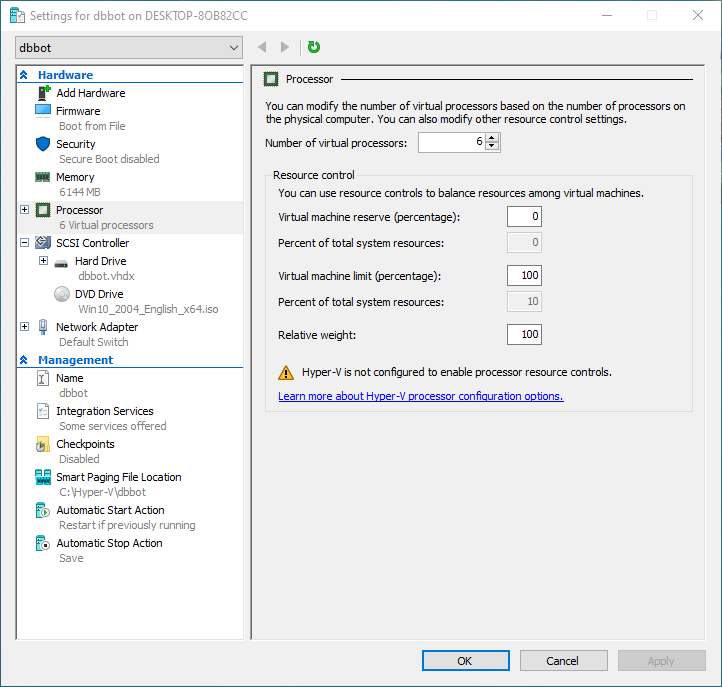
Assign a proper amount of cores. 2-6 recommended
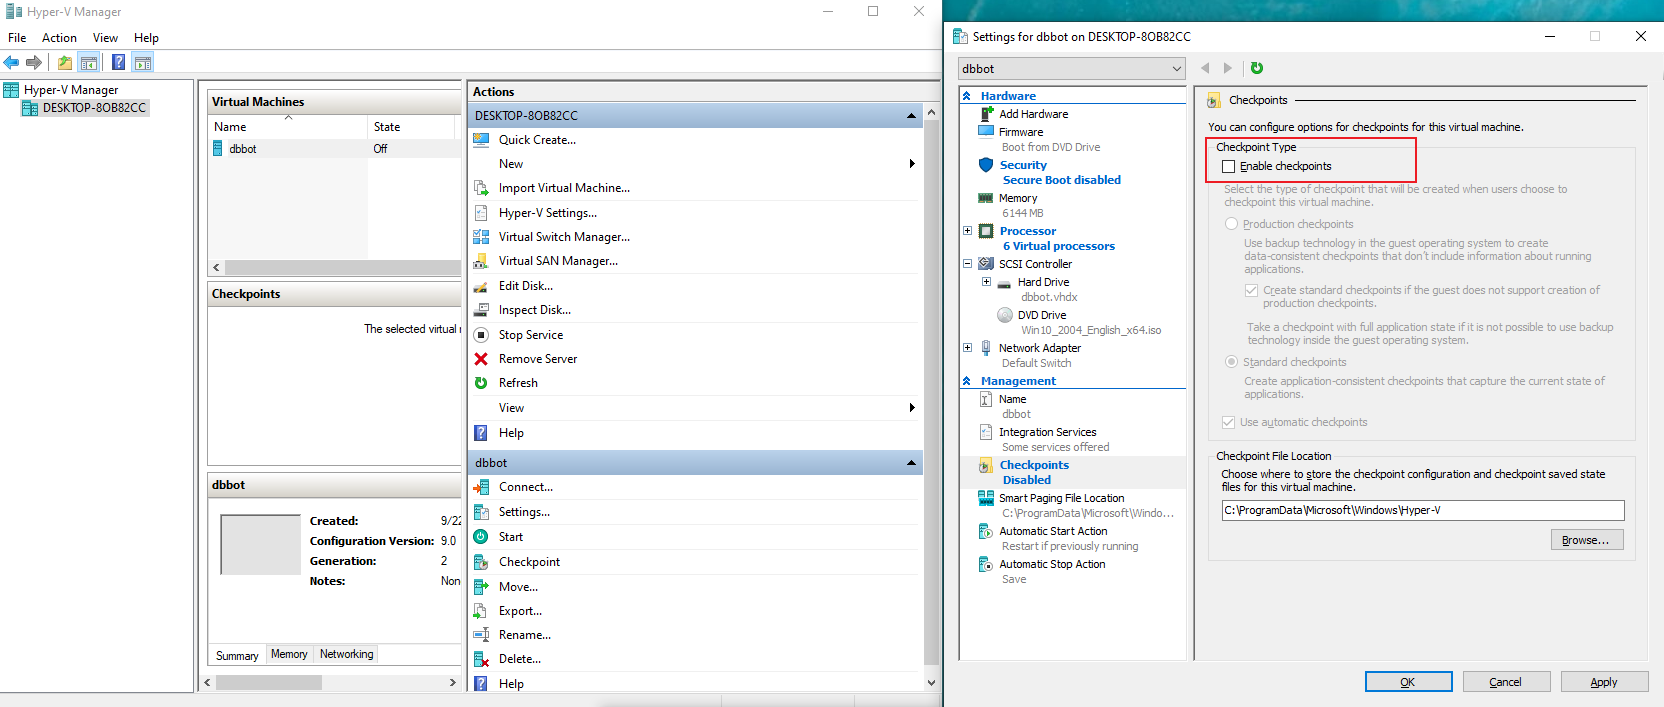
Ensure that Enable checkpoints is UNCHECKED
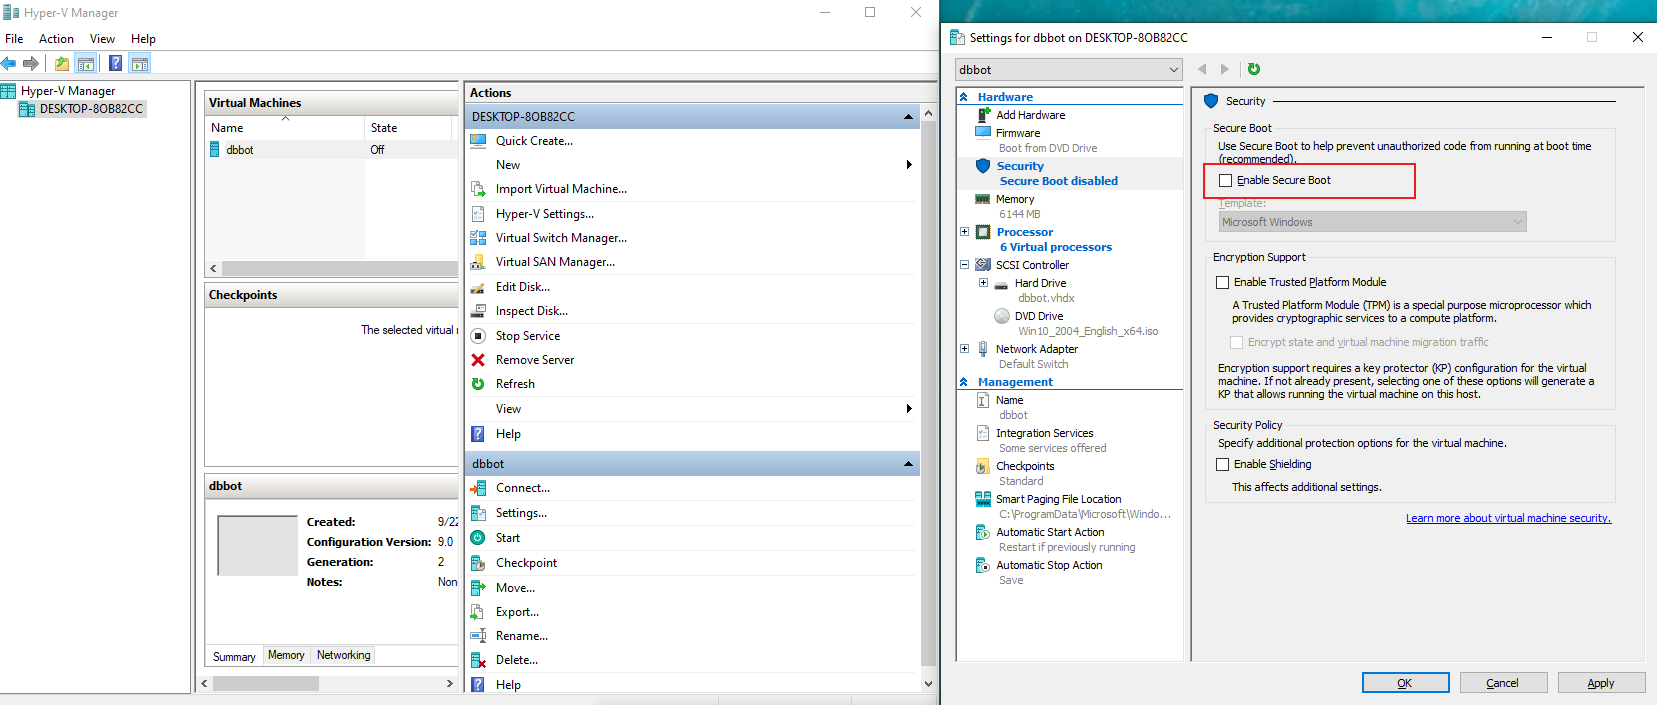
Ensure Secure boot is UNCHECKED
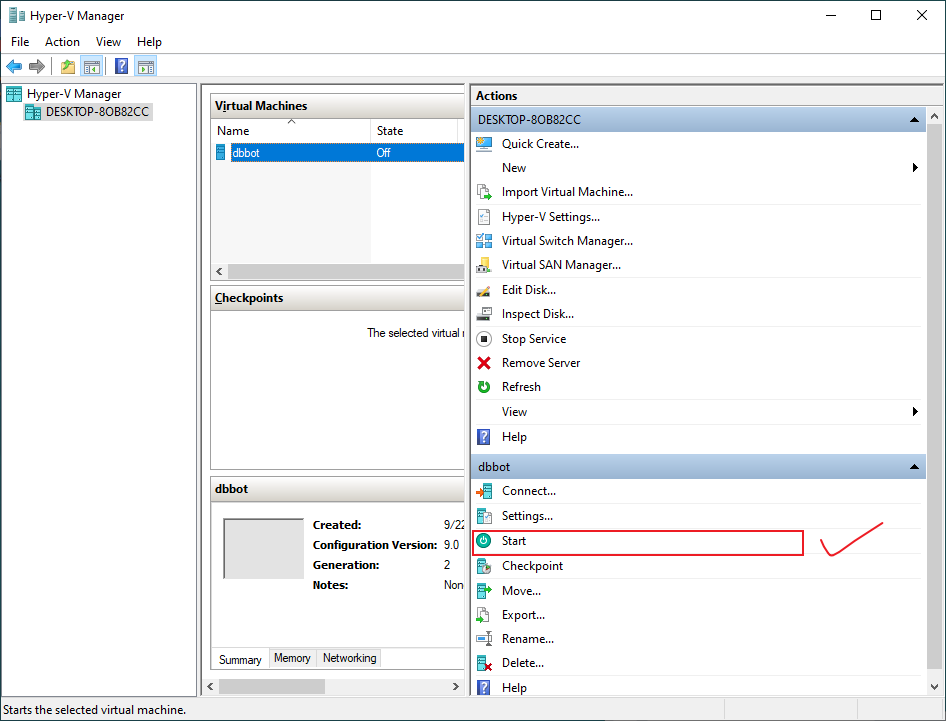
Go back to Hyper-v manager & right click the newly created VM. Select START. Double click the VM to connect to it.
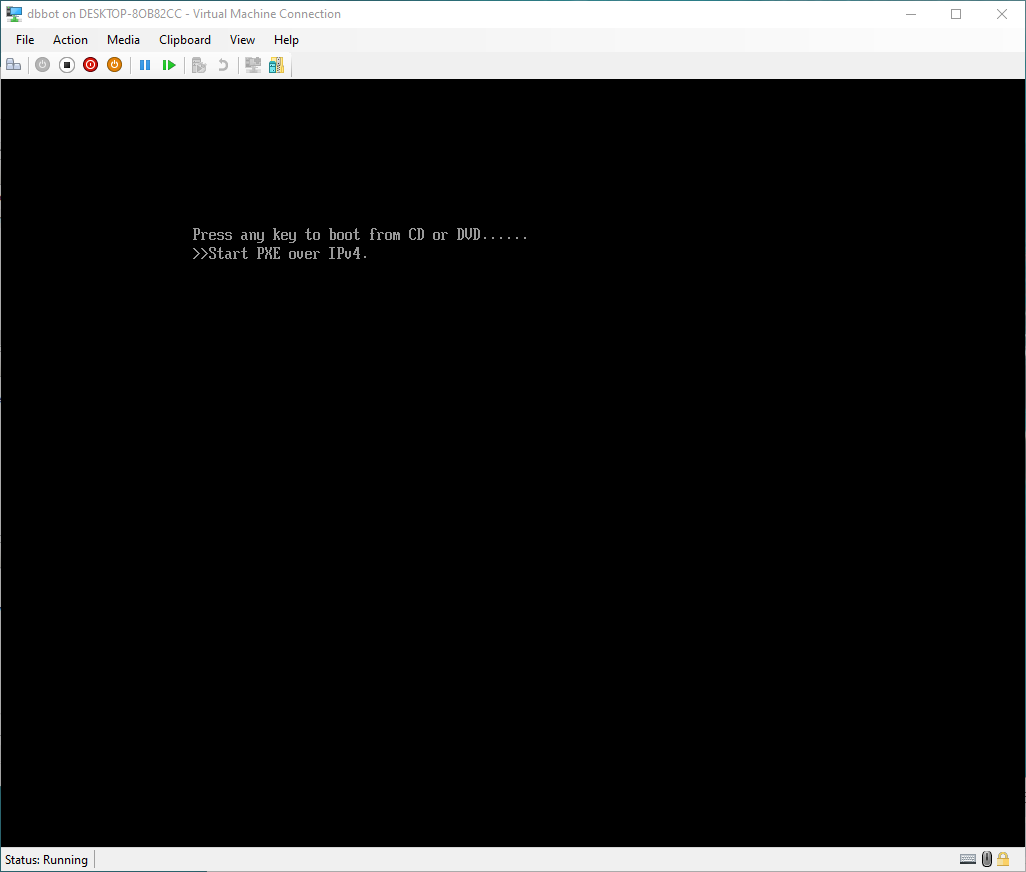
You should now see a screen like this. Press ANY key as fast as you can. If you see Start PXE over IPv4 you NEED to restart the VM & press a key before this shows up.
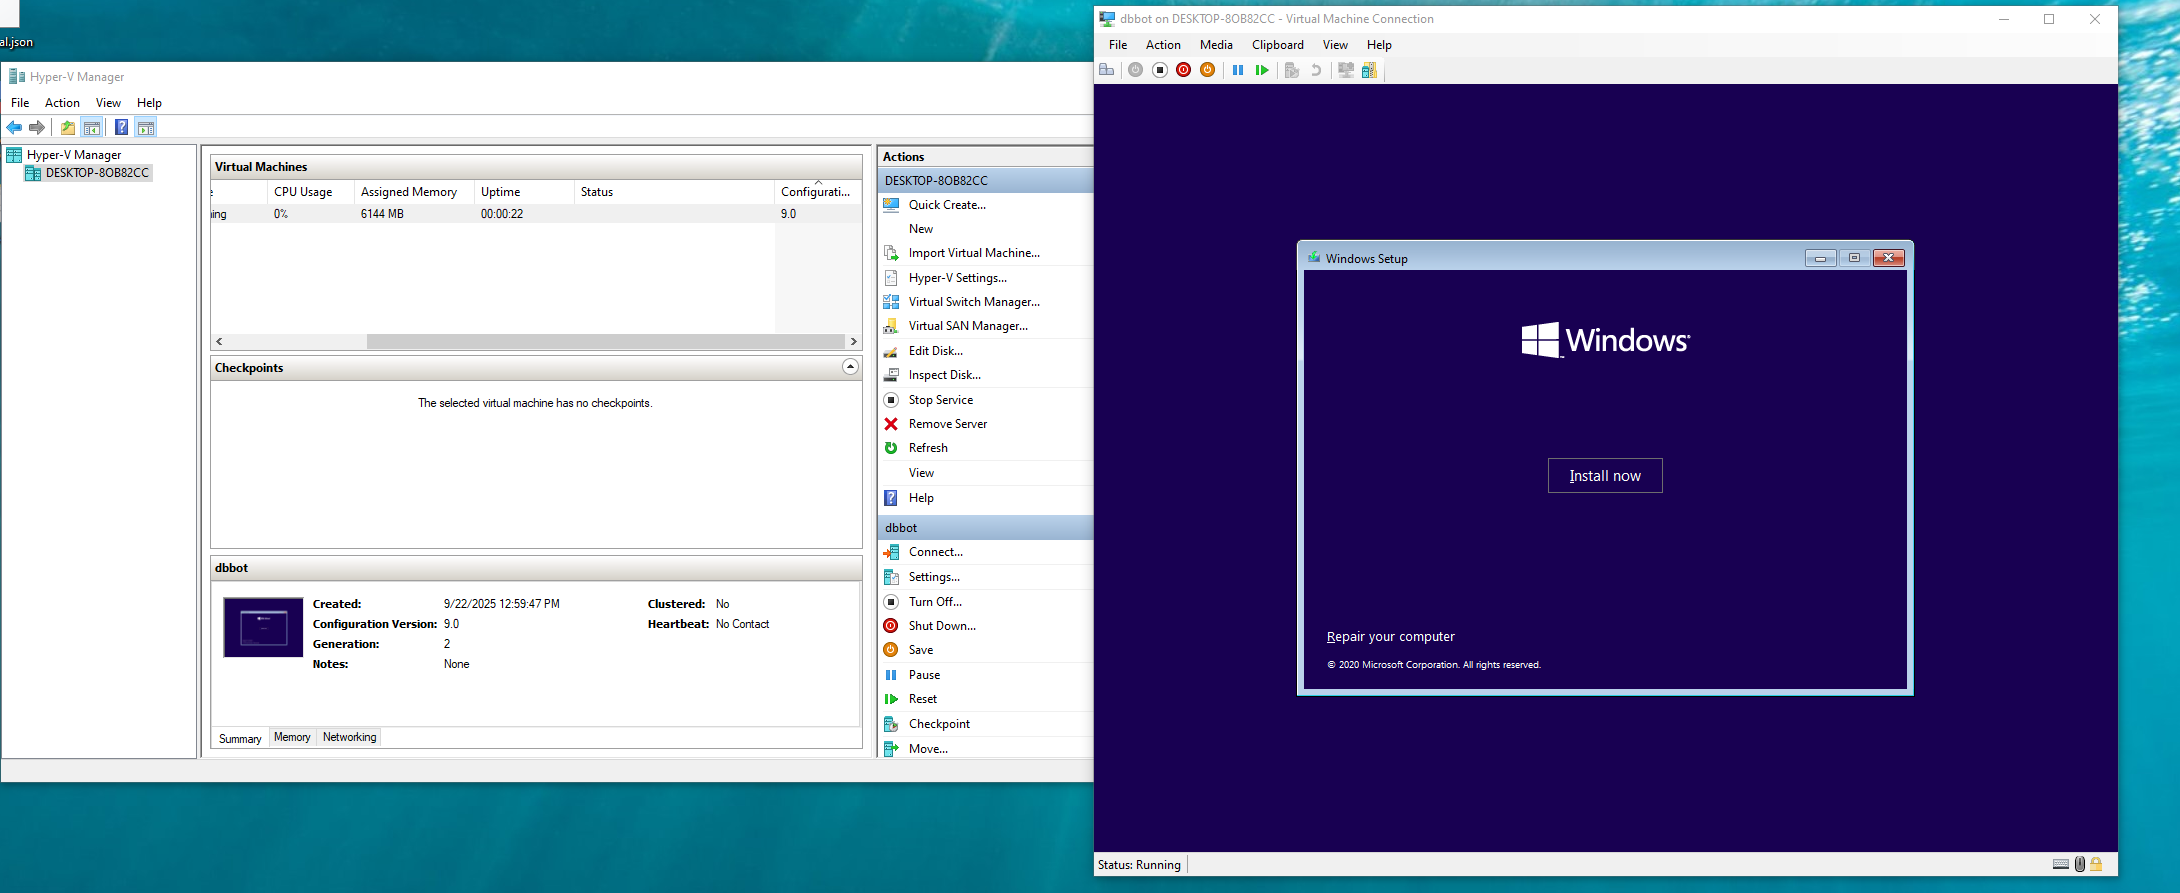
Begin installing windows.
Once windows is installed TURN OFF the VM.
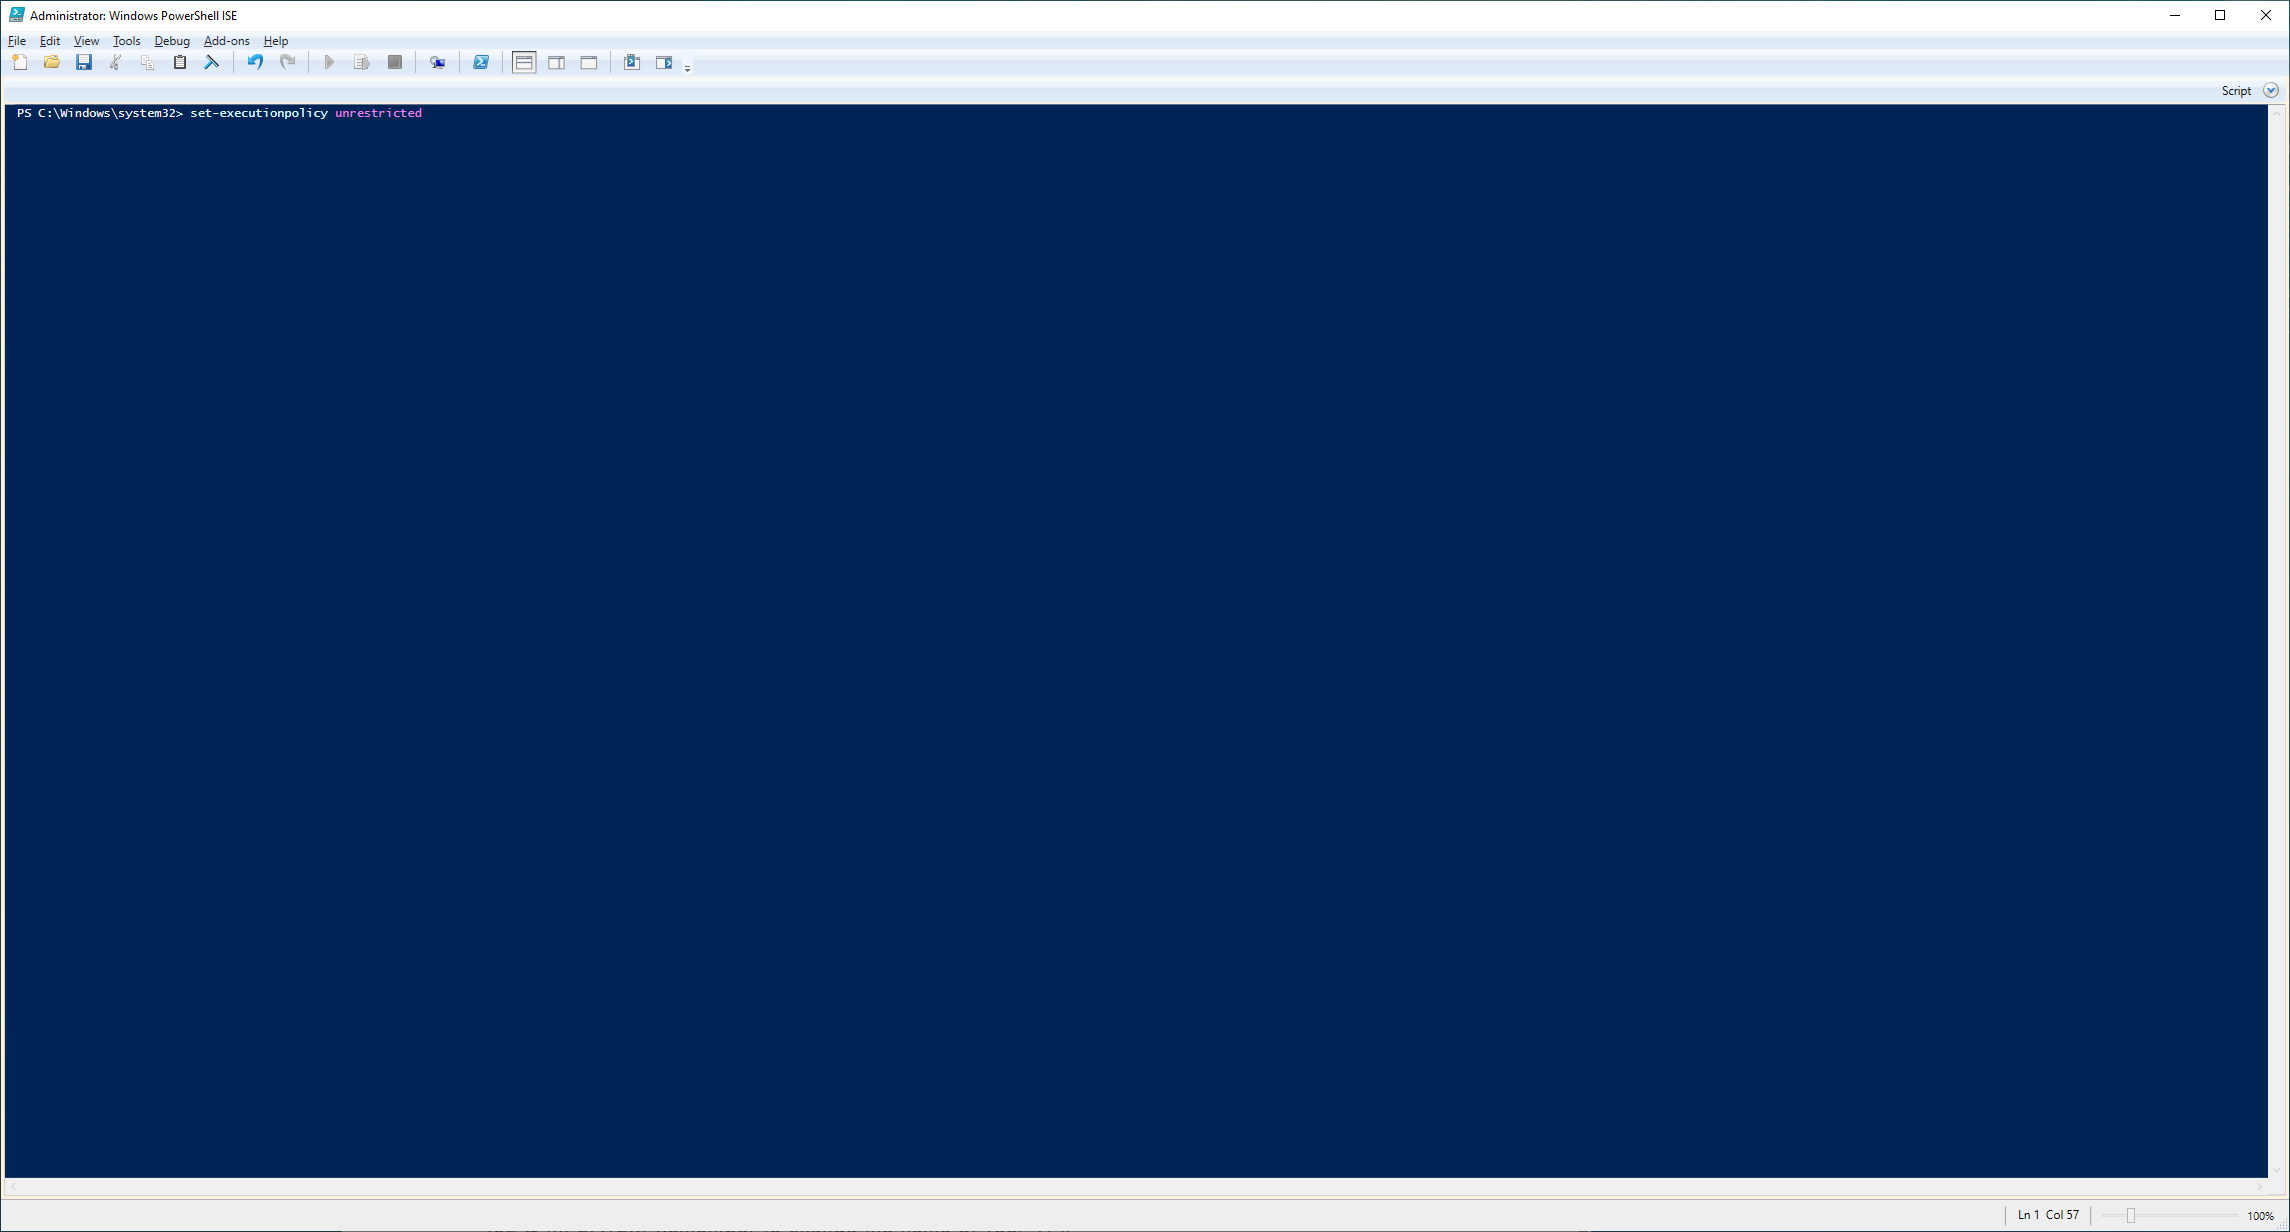
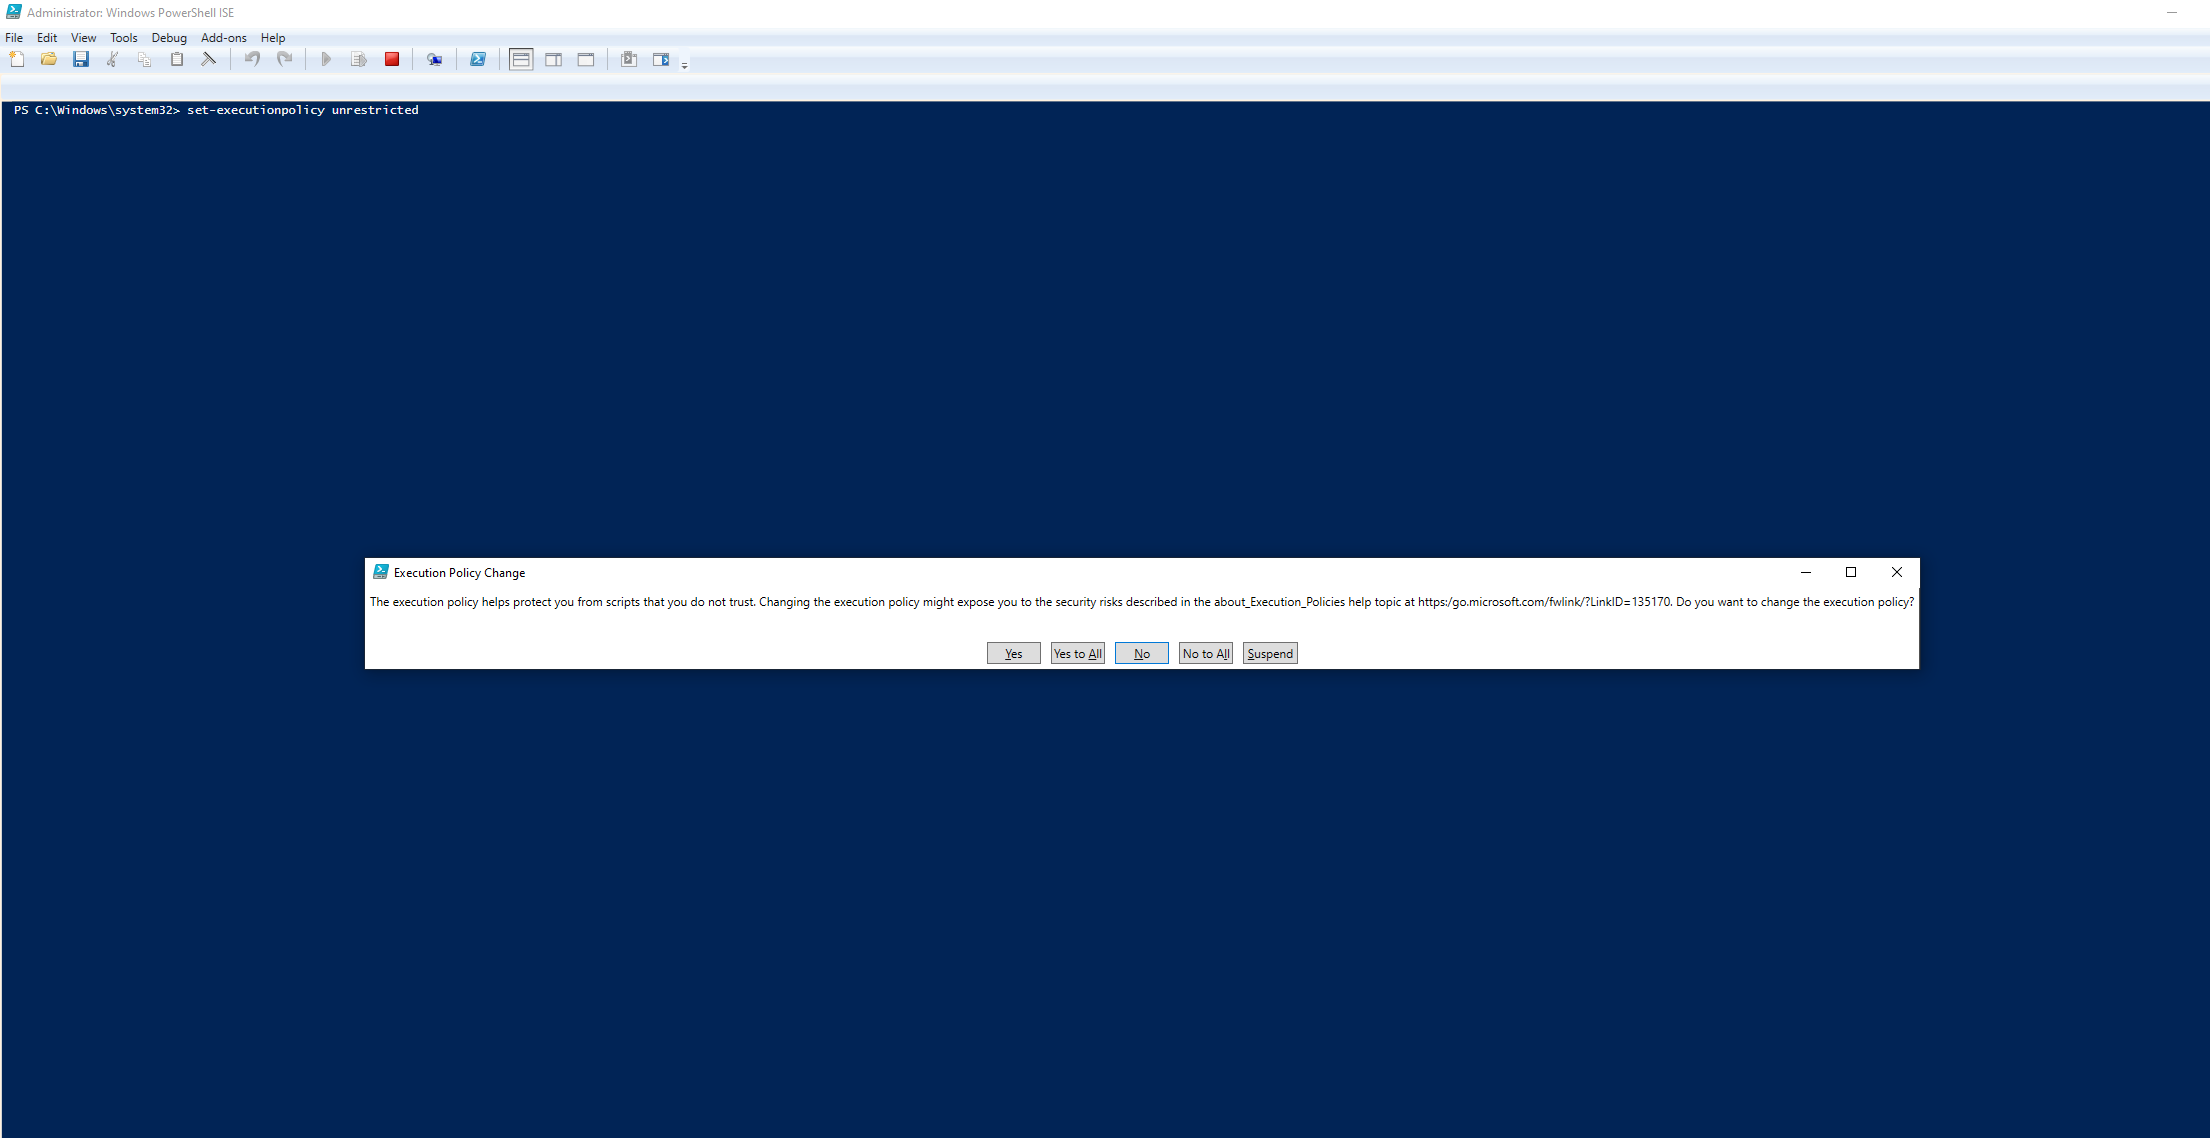
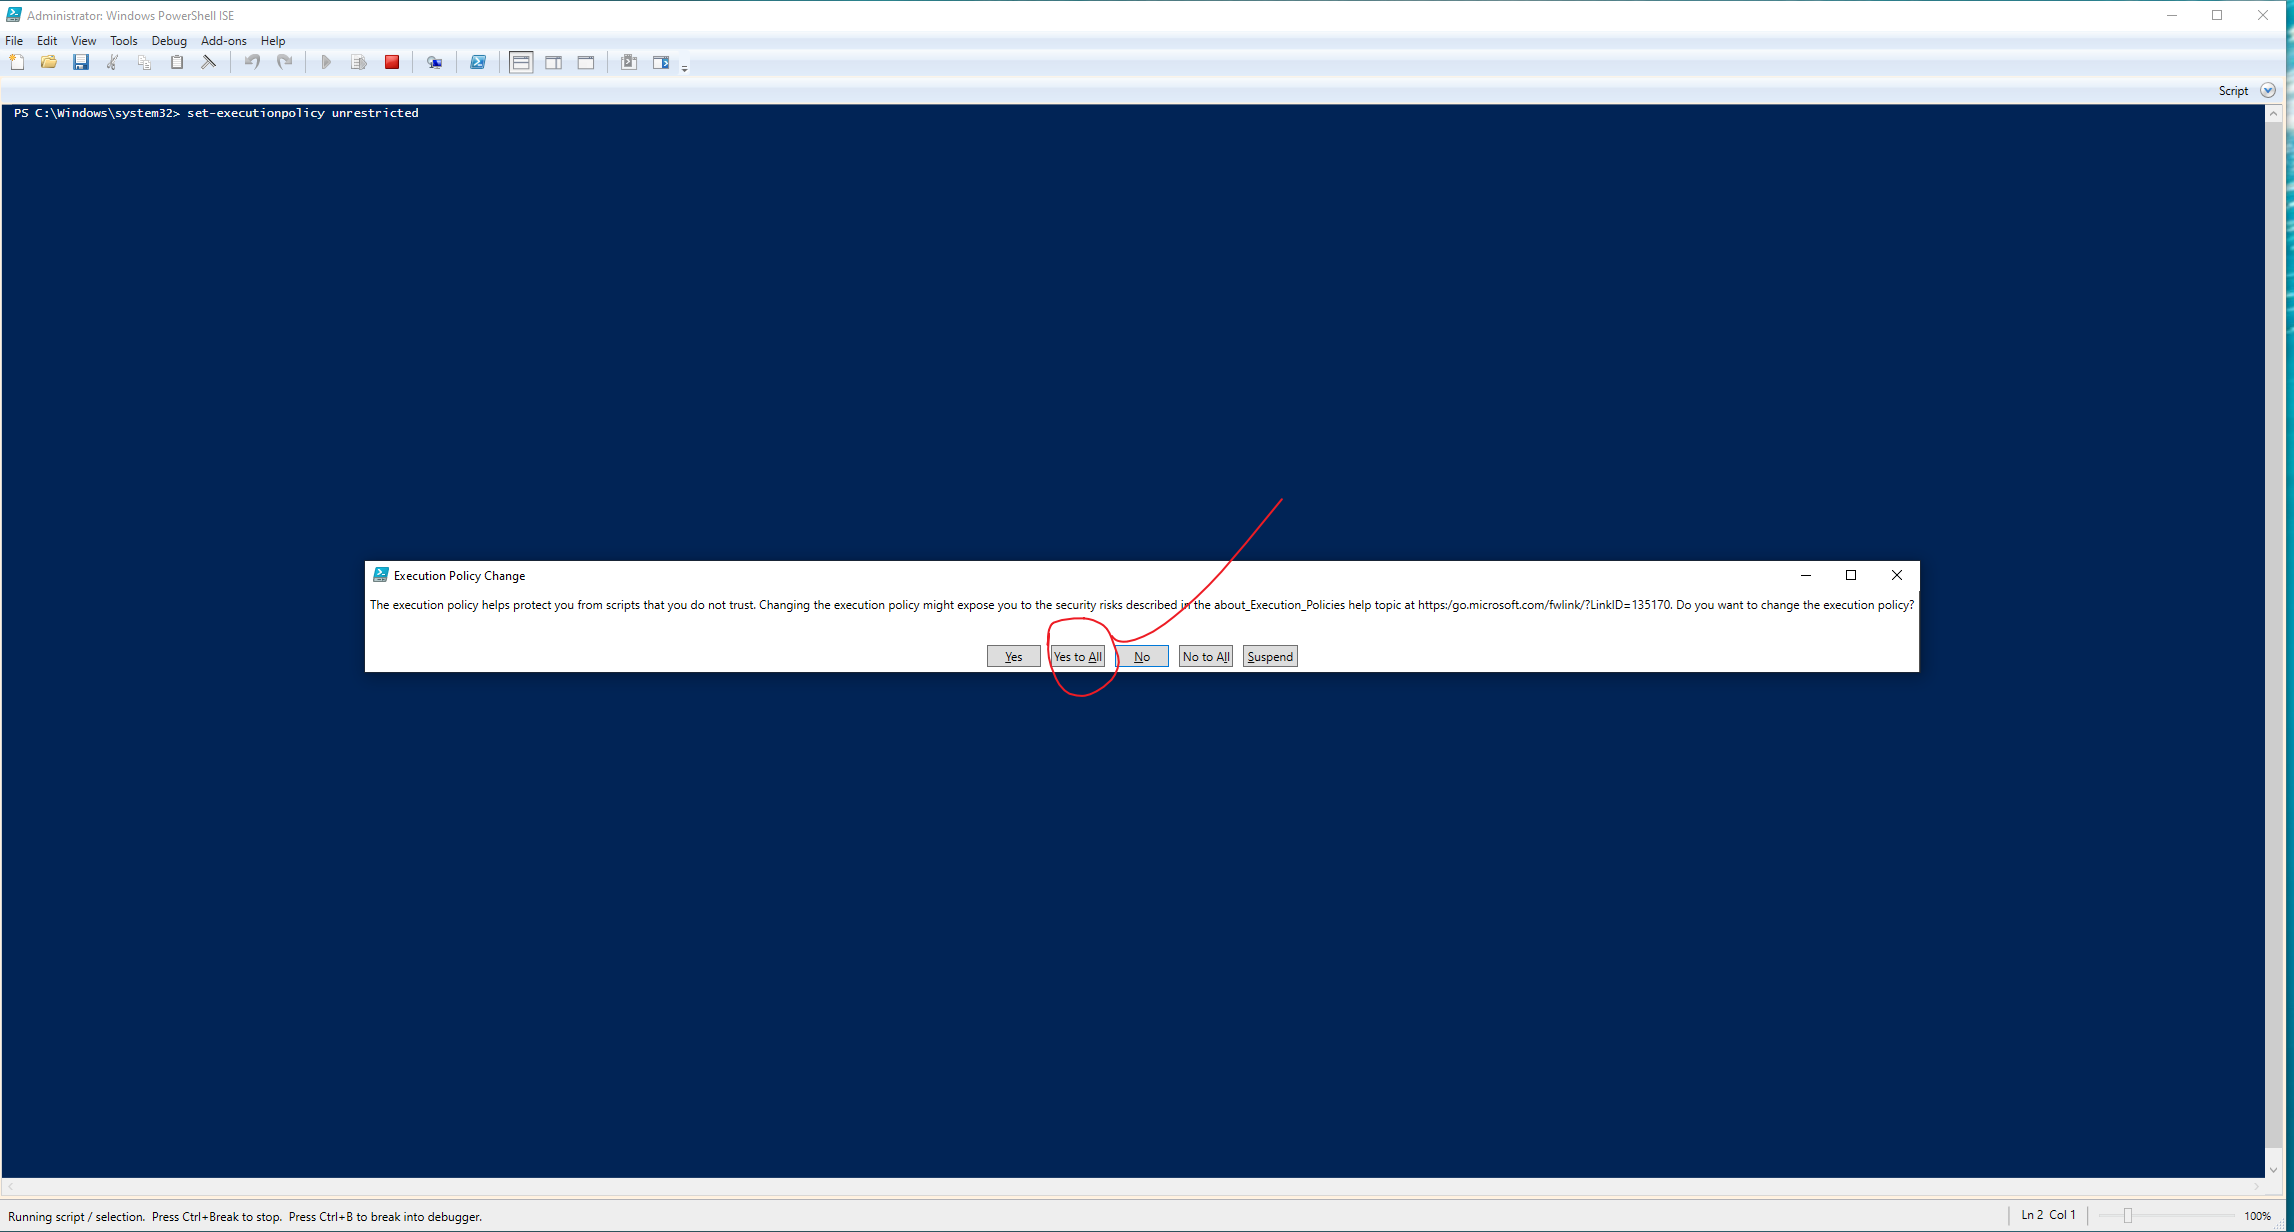
3. Right click & open PowerShell ISE as Administrator.
Once open in the lower blue area type set-executionpolicy unrestricted Hit enter & then click yes to all
Download GPUDrivers.zip & extract them in the same folder as your VM files. Now goto File -> open then open the Update-VMGpuPartitionDriver.ps1 file.
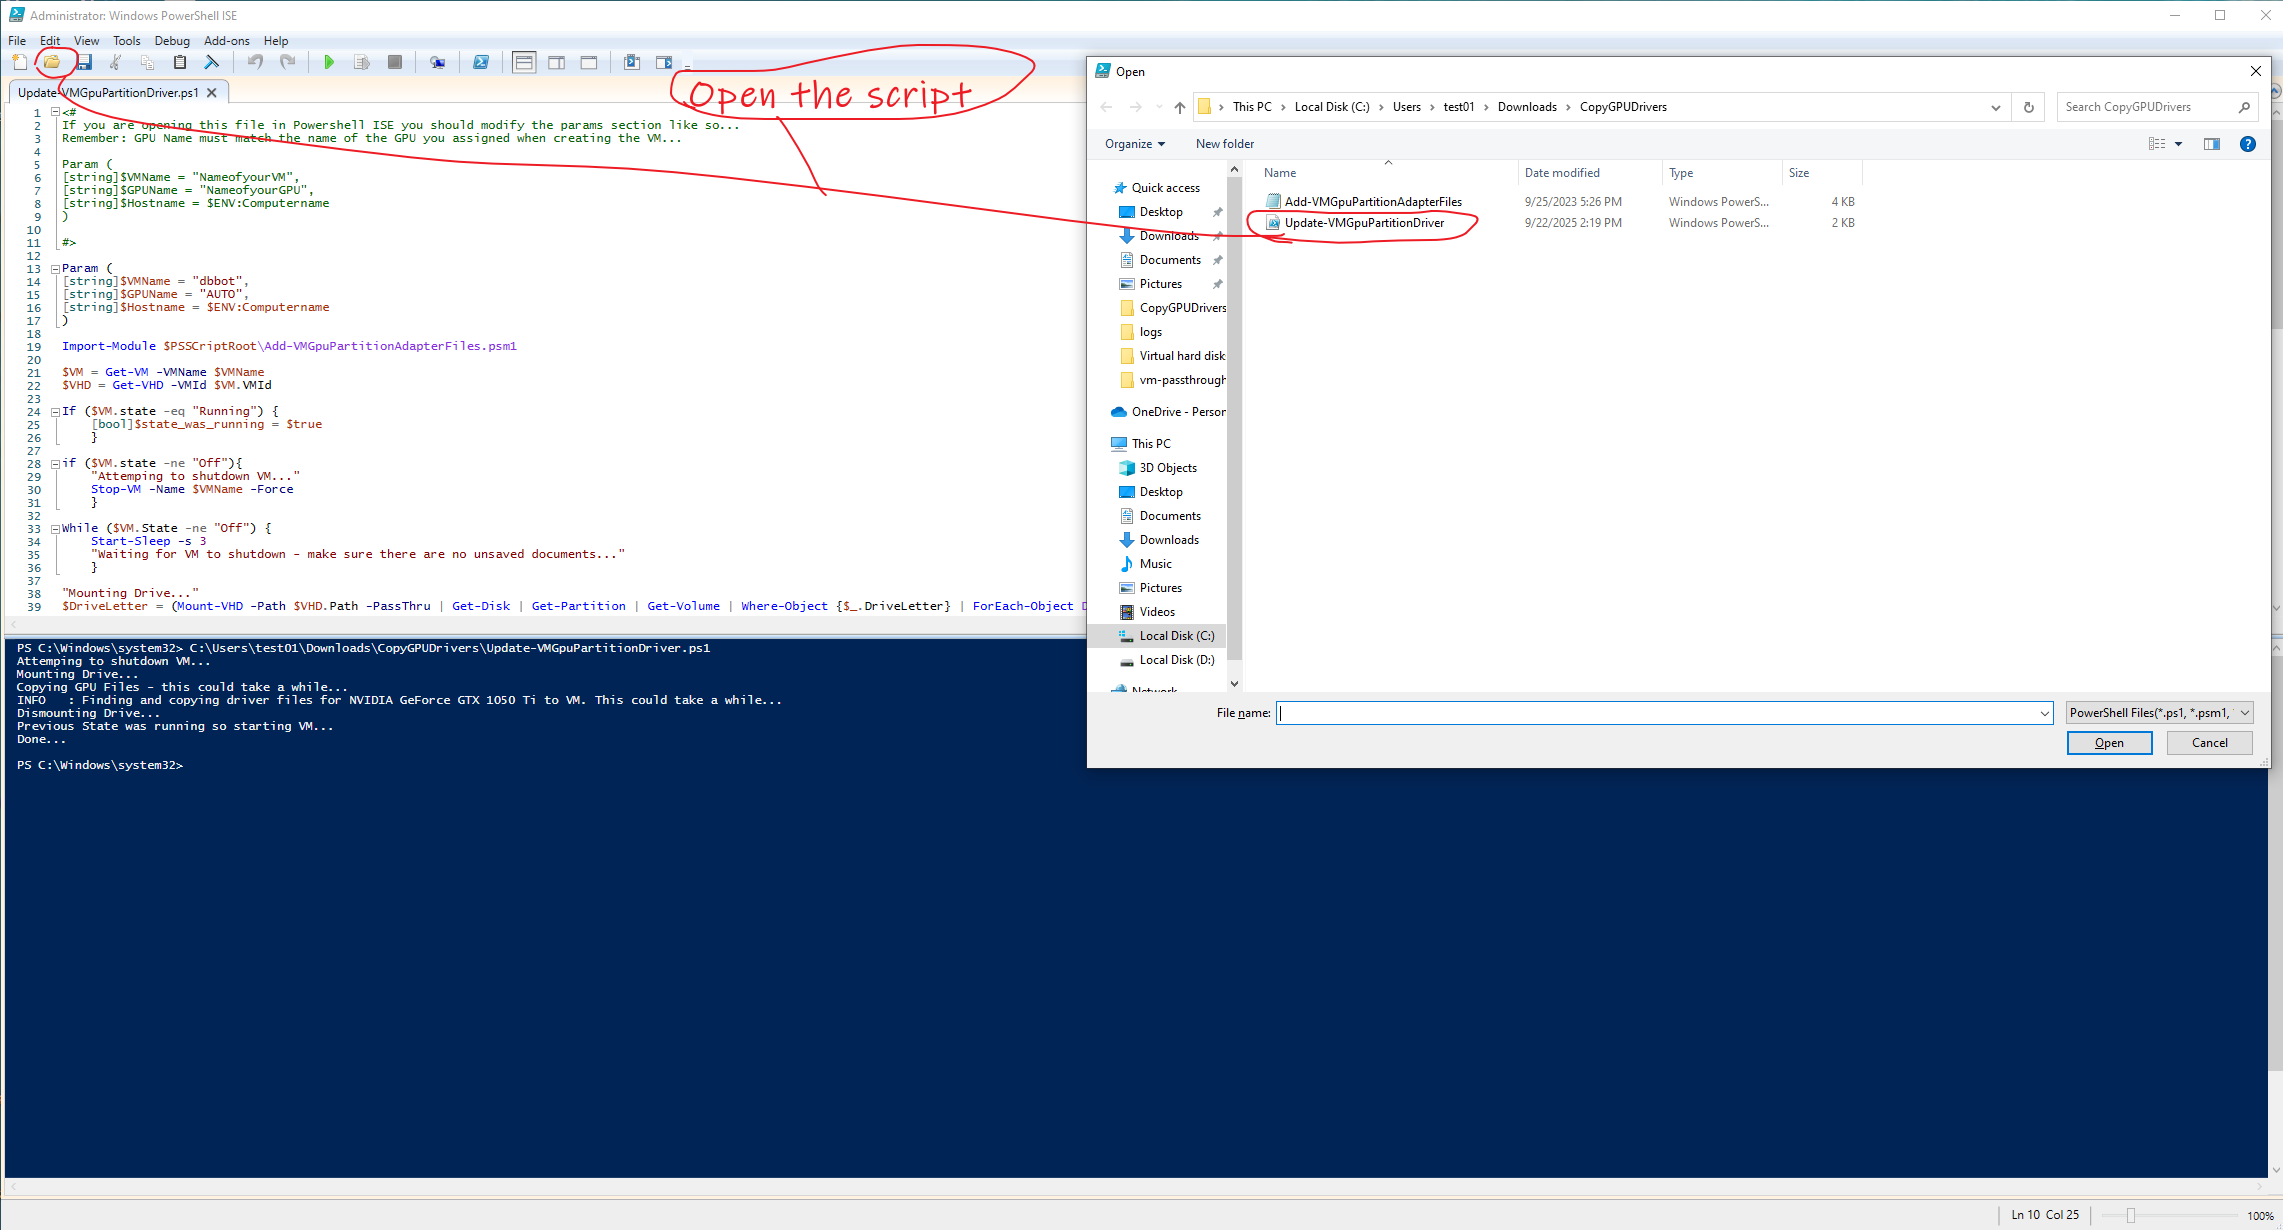
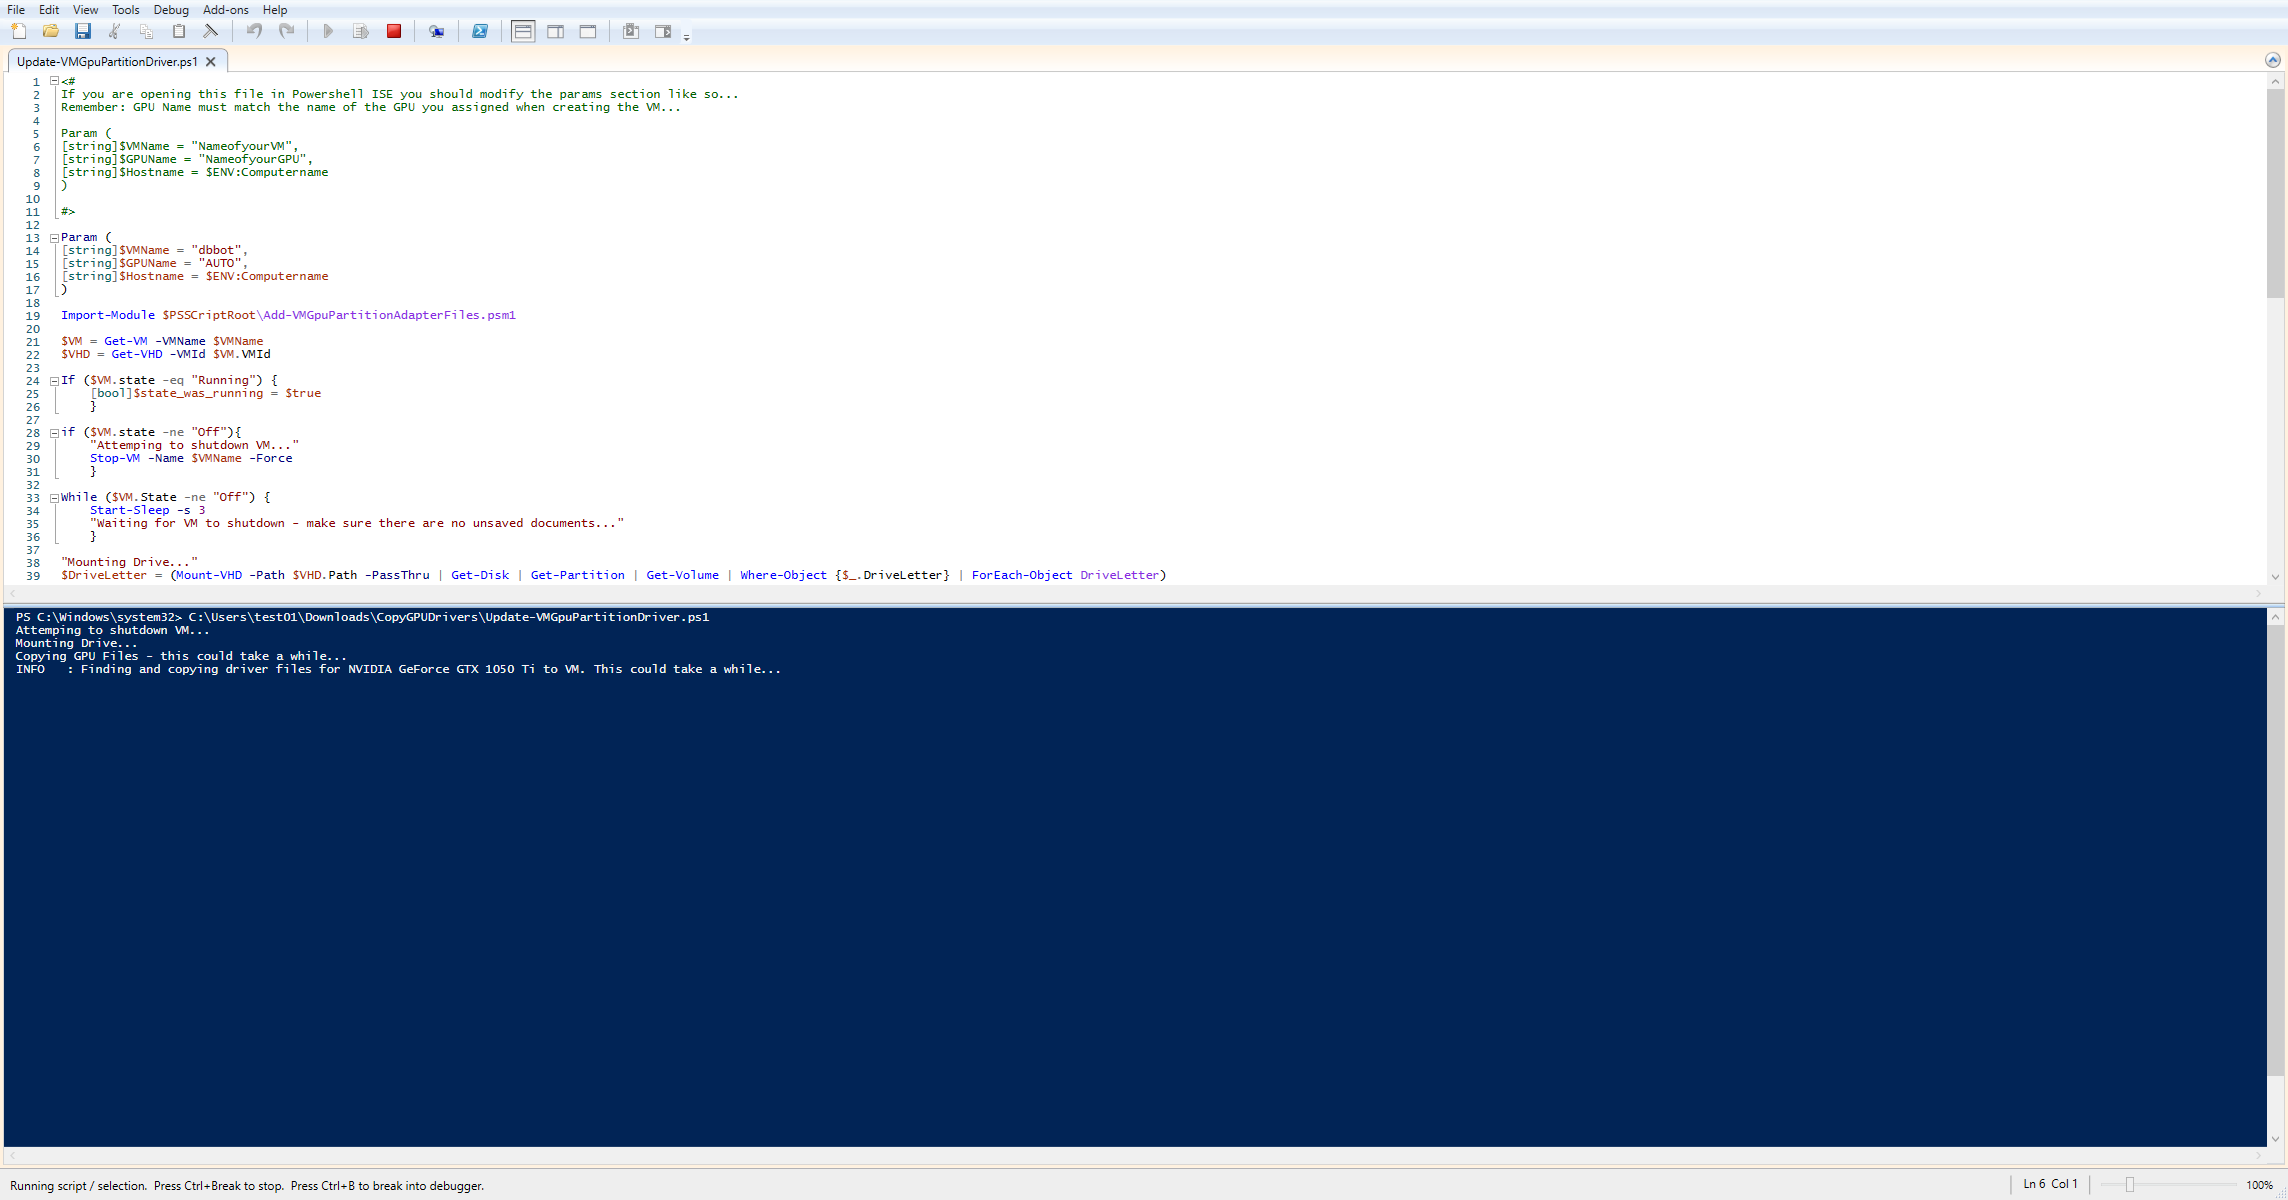
Change VMName to the name of your VM. Leave GPU as AUTO
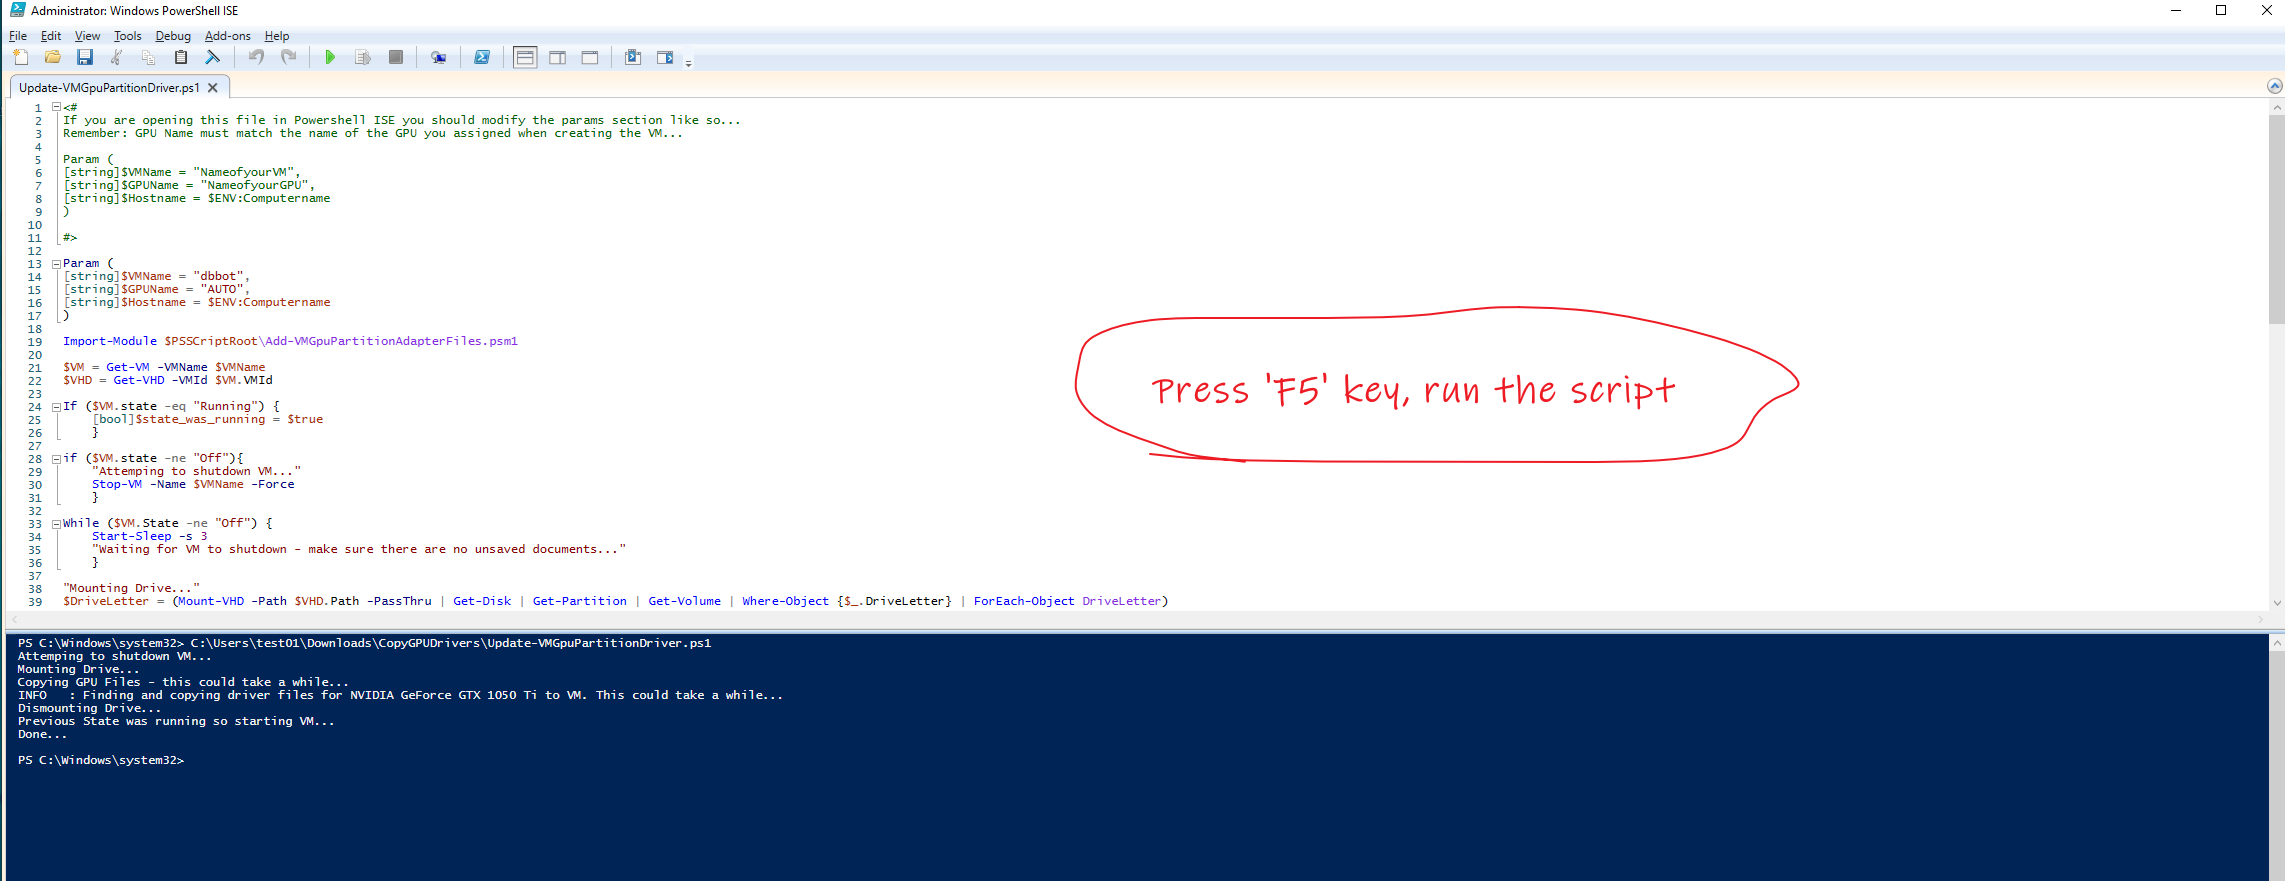
Click Run or hit F5 on your keyboard. The program should run successfully as shown here. Once this is done you have copied over your drivers to the VM.
Now we want to enable passthrough.
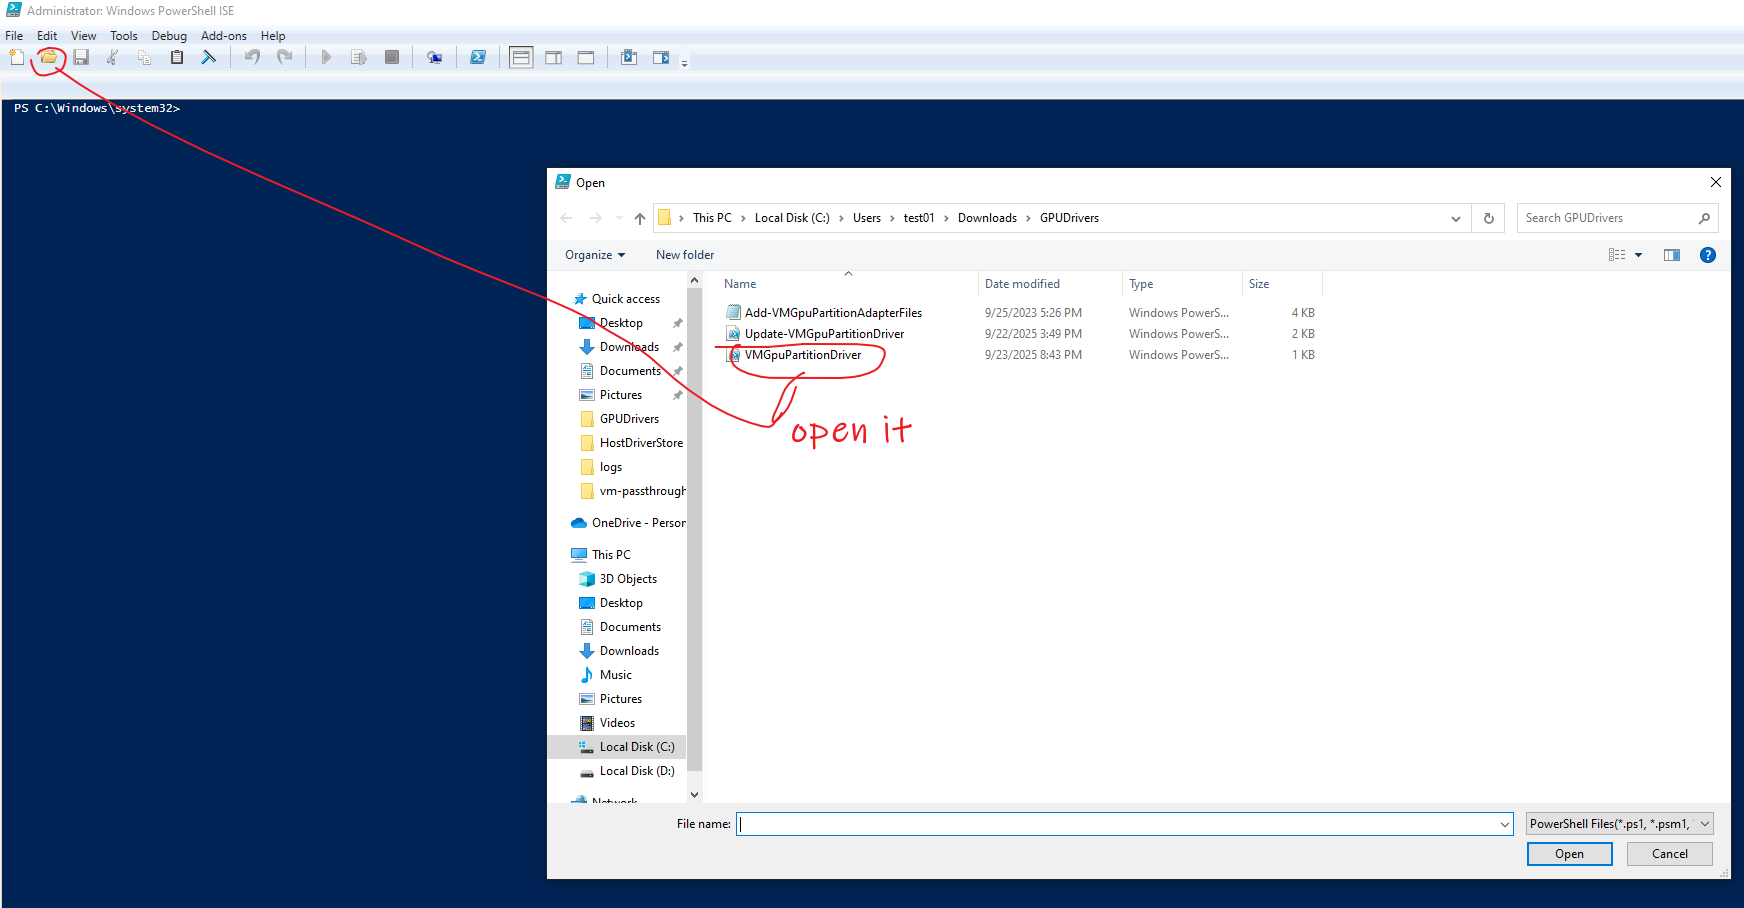
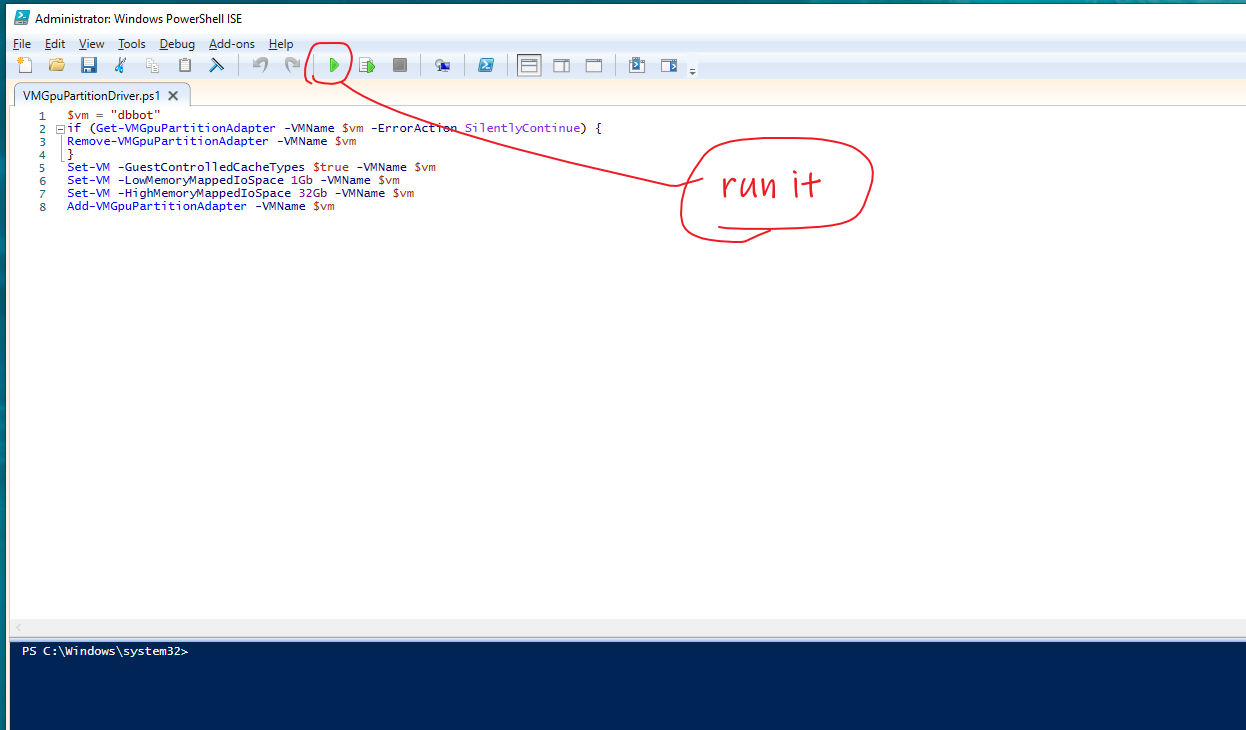
Now goto File -> open then open the VMGpuPartitionDriver.ps1 file. Click Run or hit F5 on your keyboard
Remember to change the name of your VM.
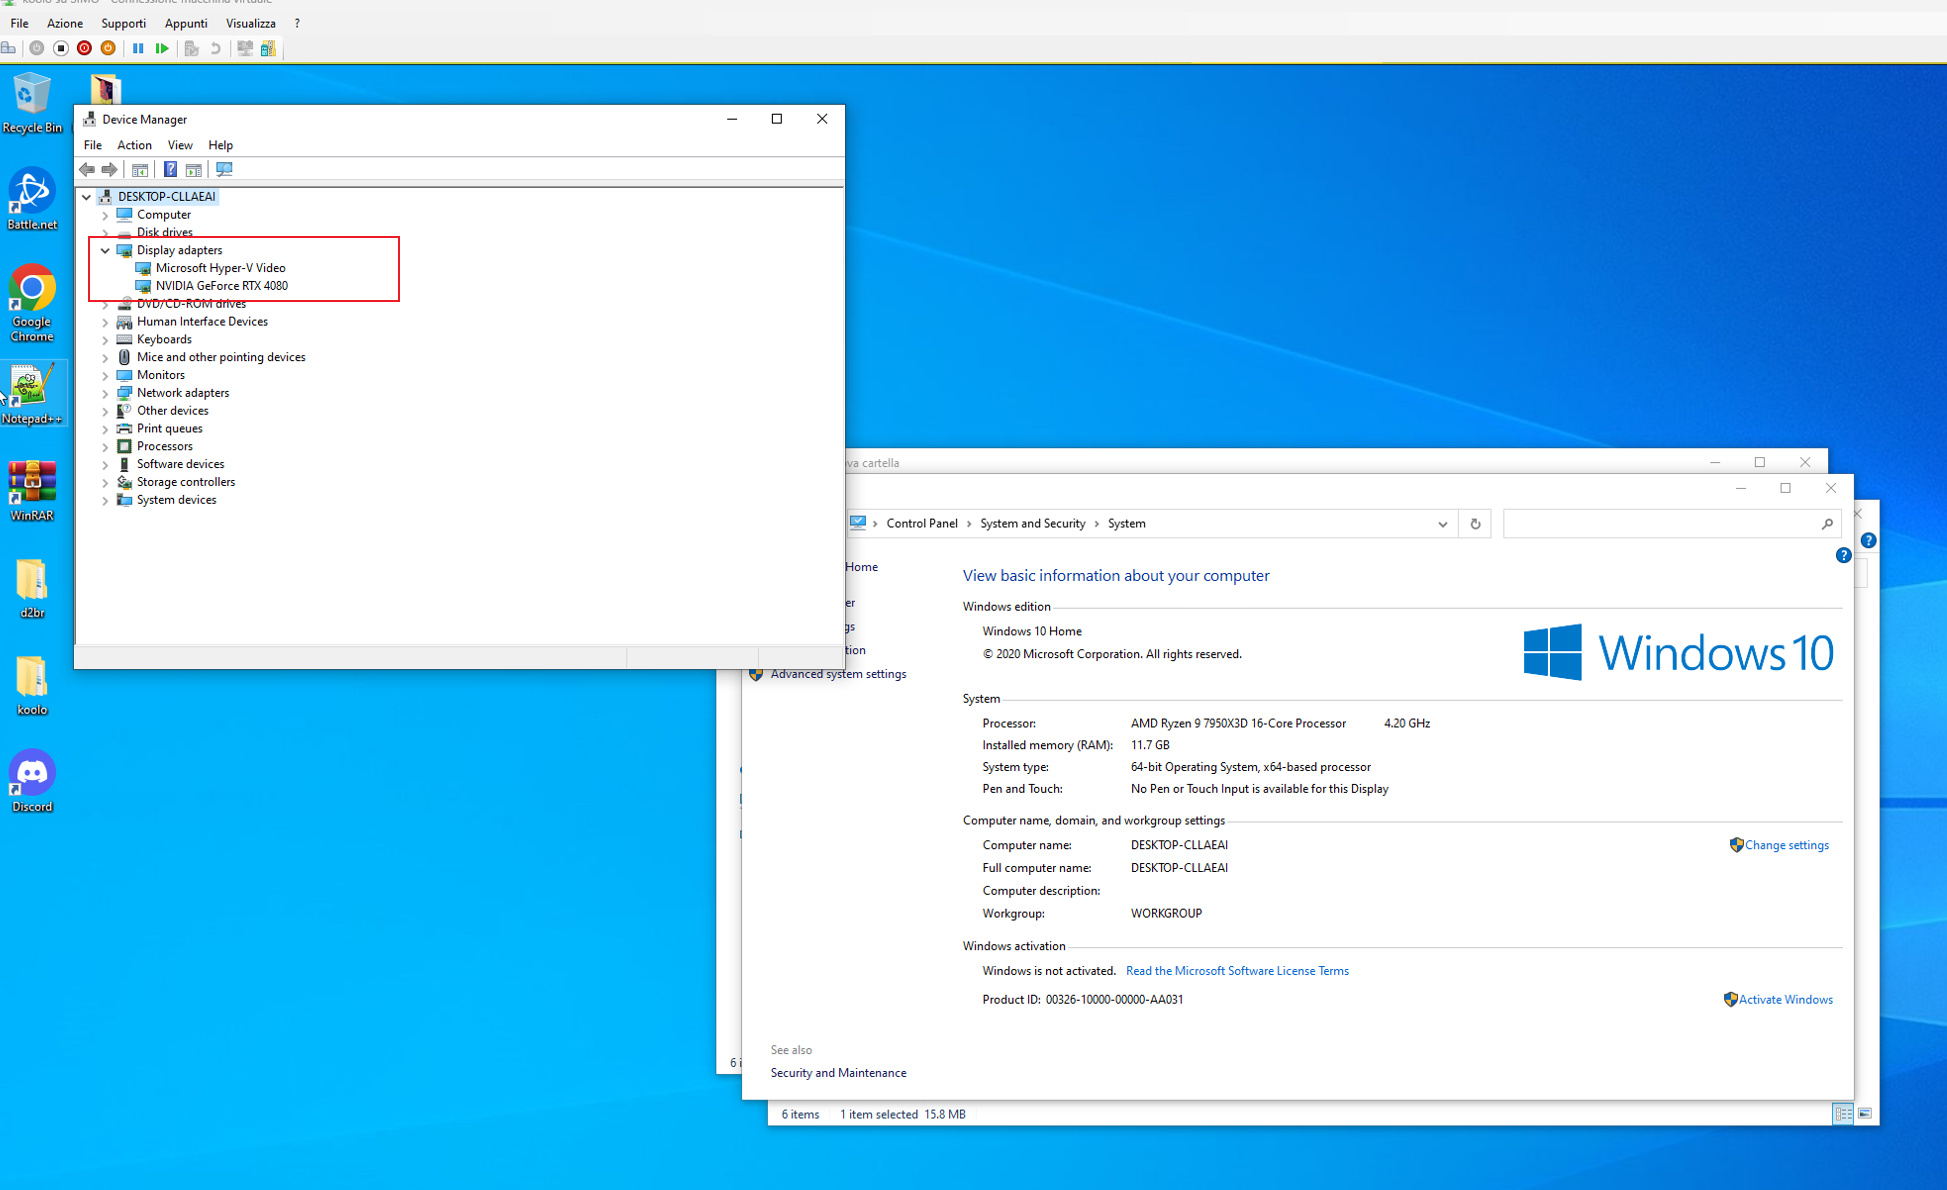
Start your VM and ensure passthrough worked by opening the device manger then expanding the display tab. You should now see your video card listed in the devices.
Good luck!
D2r Bot for sale at https://www.d2bin.com/
Buy cheap D2r Itmes at https://www.d2mule.com/ (Discount Coupon Code: d2mule)
Join our Discord Server: https://discord.gg/3kaNAgdxgf
Lowest price promise – if you find it cheaper, we’ll match it!